Post by ILLGotti on Apr 16, 2010 15:52:48 GMT -5
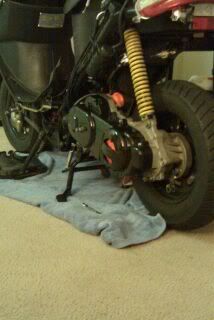
Hey guys thought I'd share some good info. I am gonna show you all how to lap valves. For the people out there that doesn't know what that means, I am basically going to use an abrasive paste to create a nice "seat" for the valve. It helps make sure your going to get enough compression, and not leak intake/exhaust gasses. Also, if you don't have enough compression, your not even gonna start... SO, first off, this work is being done on your scooters head. So unless your doing the work on a NEW head, you'd have to take off your intake, exhaust, engine plastics, camshaft, etc...
I also did a port and polish on this head. Its not covered in the explanation, but you may be able to see it in the pics.
First here is the head. I have circled in BLUE the valve spring retainer, and circled in RED are the valve "keepers" Basically we want to push down on the retainer so we can take the keepers out

You need a valve spring compressor. I have heard of people doing it with socket wrenches, but this compressor only cost me 20 bucks, on ebay, and doing it right is worth it

Once you compress the spring, you remove the keepers, and let the pressure off the compressor. Now you can remove the valve springs and retainers. And the valve itself


We are going to add the lapping compound to that shiny ridge on the edge of this valve.

Before I do that I am going to finish my port work. I did a lot of it already, but you can't get to the tight spots with the valve still installed. You can see the casting process left a ridge on the inside of the exhaust passage. Now I can get in there without hitting the valve.


Back to the lapping... Here is the stuff I used.

Here is the lapping compound oozing out the edges of the valve seat.

Now, at this point, they have a tool for lapping larger valves, its like a suction cup that sticks to the valve surface and your meant to rotate the valve to do the actually grinding. These valves are really little, so I wrapped the exposed valve end in cardboard and held it with some vice grips then just rotated the whole head. You should hear the grit as you rotate it. It will "push" the lapping compound out, so you need to push the valve open and back closed to keep feeling grit (you'll; understand if you do it.)
This valve is done. you can see the shiny strip on the valve surface, and its not even cleaned yet.

Now clean the area well, and do the other one. Here are both valves done. You can see a strip around that surface where it has ground against the inside of the valve seat.

Install it all back, and YOUR DONE!!!!
I also did a port and polish on this head. Its not covered in the explanation, but you may be able to see it in the pics.
First here is the head. I have circled in BLUE the valve spring retainer, and circled in RED are the valve "keepers" Basically we want to push down on the retainer so we can take the keepers out
You need a valve spring compressor. I have heard of people doing it with socket wrenches, but this compressor only cost me 20 bucks, on ebay, and doing it right is worth it
Once you compress the spring, you remove the keepers, and let the pressure off the compressor. Now you can remove the valve springs and retainers. And the valve itself
We are going to add the lapping compound to that shiny ridge on the edge of this valve.
Before I do that I am going to finish my port work. I did a lot of it already, but you can't get to the tight spots with the valve still installed. You can see the casting process left a ridge on the inside of the exhaust passage. Now I can get in there without hitting the valve.
Back to the lapping... Here is the stuff I used.
Here is the lapping compound oozing out the edges of the valve seat.
Now, at this point, they have a tool for lapping larger valves, its like a suction cup that sticks to the valve surface and your meant to rotate the valve to do the actually grinding. These valves are really little, so I wrapped the exposed valve end in cardboard and held it with some vice grips then just rotated the whole head. You should hear the grit as you rotate it. It will "push" the lapping compound out, so you need to push the valve open and back closed to keep feeling grit (you'll; understand if you do it.)
This valve is done. you can see the shiny strip on the valve surface, and its not even cleaned yet.
Now clean the area well, and do the other one. Here are both valves done. You can see a strip around that surface where it has ground against the inside of the valve seat.
Install it all back, and YOUR DONE!!!!
 +1
+1