|
|
Post by slowscootin07 on Jun 22, 2008 15:21:02 GMT -5
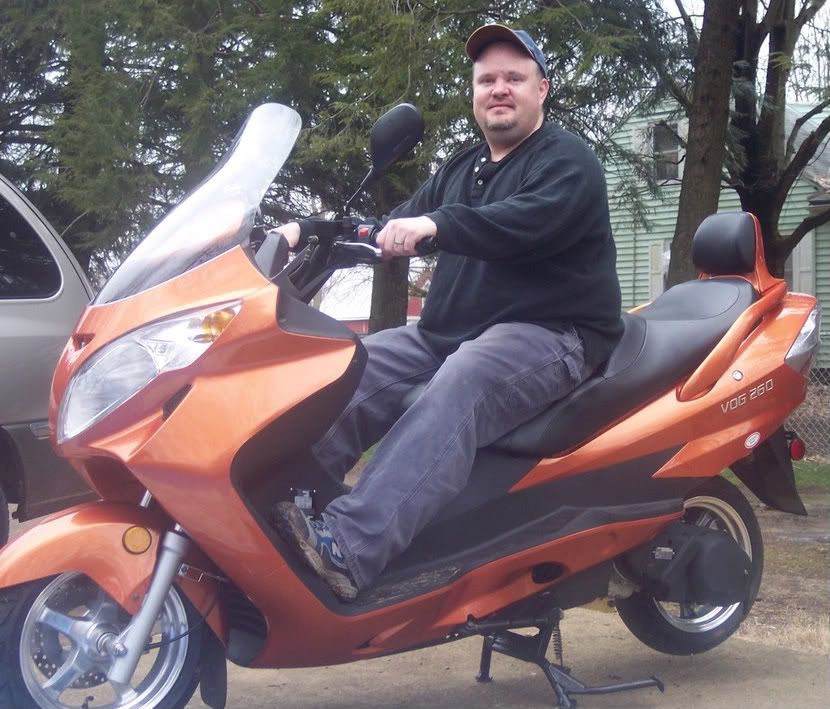
OK now time for the third installment. Break-In: I've broken the 100-mile mark with the hard break-in and have been riding it to work and cruising around. I’ve breached 200 miles right now and am enjoying every bit of it. At the 100-mile oil change mark, the crank and gear oil came out clean and flake free. I'm going to continue to change the oil every 200 miles until I reach 1,000 and then switch over to a synthetic. It’s a bit overkill you might think, but I've never heard of an engine being damaged by changing the oil too frequently and I am an ASE Mechanic. I haven’t found a synthetic 85 W140 for the gear oil yet and might go a slight grade lower since I’ll be changing it so often. This beast handles well in traffic and is large enough that I can be seen and powerful enough to pull away from a stop and not tick off cagers behind me. Scooters have been popping up left and right around here and it seems that people are becoming more aware of smaller vehicles on the road. That doesn’t mean they give berth, but it does mean that they’re seeing more and more of them. Motorcycles still are the higher percentage of two-wheelers on the road around here, but every day it seems I see another different scooter. I took my MC test last weekend since I've been riding around with an L class license (SHHHH) and not an M. The place was mobbed with scooters and a few MC's and I had a good 45-minute wait for the obstacle test. There was a guy on a new Vespa 200GT right after me and we went for a little ride afterwards and compared notes. I know for a fact I didn’t trust him on mine, nor me on his so we just cruised around a bit. I'm not a fan of the vintage style-retro scooters but I was impressed by it's build and form and it was a nice looking scooter. Not that I condone racing on the street, but he was bragging about how fast and quick it is was and we wanted to see exactly who was faster and quicker. Why not? It’s broken in and curiosity got the better of this cat for sure. We went onto a double lane road with a 55 mph speed limit and went at it. Off the line, that little sucker took off in front of me real quick, and I didn’t start to gain on him until around 35mph indicated. Once I hit 50 I’d caught up and he was reading my ever so fading license plate after that and I spanked his top speed with no contest. We did another run in the other direction and the results were the same. I do have a feeling that the Fire Drake has a limiter of sorts on it. I was steadily climbing past 65 indicated up to 75, but it seemed to vastly slow down climbing in speed after that and it was quite noticeable as if something suddenly “clicked”. As soon as I hit the little red dot on the speedometer (75ish mph), it very slowly climbed to almost 80 indicated, then stayed put. It stayed at near 80 going up a small grade, but didn't go faster down a hill and I thought I felt a little stutter as if the ignition was being cut out at that point. I'm going to research this further to see if that's the case. It was quite stable at top speed and felt like I was riding on a rail, but it was a bit fast for my comfort zone. At 60-70 it just seemed to float along without any worries and that’s my personal comfort zone maximum on it. It is, however, nice to have that extra oomph and ten miles an hour available if needed. The temperature gauge never went past the low mark at a sustained 65 and it only really starts heating up in stop and go traffic, then it’ll get to the mid mark. I tested the speedometer’s accuracy via a real nice Garmin Nuvi GPS, but I know that they’re not always accurate with speed, but distance is pretty much right on with them. The Speedometer, like 90% of all scooters, is optimistic and indicates 5mph faster then actual speed in all ranges. It’s kind of aggravating, but at least it’s a constant difference and not on an increasing curve. If it says I’m doing 30, then I’m doing 25. If it says I’m doing 80, then I’m going 75. The odometer is confirmed to register in miles and is 10% off. 10 miles registered on the odometer is actually 9 miles. On the highway I felt comfortable in traffic and felt as if I had control at highway speeds but I really didn't like the semi-truck wind wash effect. It did cause some drift, but not anything too scary and as long as I didn’t over compensate, was doable. Although it is highway legal and can keep up with traffic, it's definitely something I wouldn't want to do on a daily basis for a long commute. This scooter is only 297 pounds dry and for the highway you'll need to have more weight when playing with the big boys in my opinion. I've made a few minor modifications on it including installation of a "Rear-Alert" brake light modulator and have added the amber bulbs that I painted in the body mounted turn signal sockets. The modulator works well, but I would've liked it to flash quicker and the only way to adjust it is to clip a wire that makes it flash continuously and never turn on steady when activated. It will give 5-6 flashes and take about 3 seconds to do it. There is no way to adjust the flash rate other than that. Originally I was going to remove the slug eyestalk turn signals and use the euro style ones only, but I think I'm going to keep both sets active. I'll show a quickie video and ask the Dawg Pound opinions on it. Since for the most parts scooters are invisible, I think anything that adds more visibility is first and foremost a top priority. This has, however doubled the power draw since I've doubled the bulbs and at idle, the headlight does dim slightly when they flash. I would suggest for any SYM or other scooter owner with the eyestalks to look and see if you too have the euro ones all ready to go. You may want to consider the draw on the charging system first before using 4 bulbs. The HD's can handle it per the service manual specs but I’m not sure about the 50cc ones. I will be looking into LED replacements and consider replacing the regular incandescent bulbs with them to try and avoid the slight dimming effect. One thing that aggravates me is that I can't activate the stoplight sensors and I did get the "finger" from a cager when I didn't trip the left turn arrow when I was first in line. The frame is steel, but since the rims are full aluminum alloy, there's no real metal to trip the sensors and I've attached a Green Light Trigger magnet on the Fire Drake's center stand. I’m not really happy with spending $17.00 for a magnet that I could’ve gotten at Radio Shack for under $5.00. It does work for most of the lights I’ve tested, but in my opinion I paid for the name and not the actual product. The magnet is exactly the same as those used to mount dealer license plates to a car. In fact, a few of the spare magnets for them that I have lying around are actually stronger and a few spare hard drive magnets I have are even stronger still. Bottom line, even though it works, I’m not impressed with the “Green Light Trigger” that I bought and suggest to everyone to buy a cheaper magnet that is the same if not better for a third of the cost. WARNING-- I found out the hard way about how to be careful when adjusting the shocks. It's easy to do and an “L” shaped allen wrench will give you all the angles you’ll need. When adjusting the "passenger" right side, be REAL careful. I adjusted it and the wrench slipped once it clicked into place. The heat shield on the muffler is freakin’ razor sharp and I shaved off a 2" strip of skin pretty deep along my pinkie. Let me tell you, it was one clean cut and it happened in an instant. I took my Dremel Tool it to dull it up a bit and chalked it up as a lesson learned a bit too late. Next installment I'll show you how I added and most importantly where I added, an accessory plug, a drink holder and perhaps a small MP3 player and amplified speakers. Room is tight on this scooter and there isn't much space to play with even behind the panels. I'm still not impressed with the under seat storage and most likely it will become a storage for my first aid kit, locks, tools and that's about it. It does get pretty hot in there and at least it keeps my lunch warm while in transit  I’ve added some more pictures on my site and a few mini videos of the turn signals so I can get the opinions of the Dawgs and Dawgettes here. I hope you’re enjoying this review and again, please feel free to ask any questions that you have. click here to see the short vids and the next set of pictures www.jeffs-hotsauces.com/firedrake3.htm |
|
|
|
Post by willyammer on Jun 29, 2008 22:55:44 GMT -5
You say your are "breaking it in hard" so the engine will last longer. From what I've read, the cylinders on the HDs are ceramic coated. Won't there be less metal-on-metal breakdown with this coating?
|
|
|
|
Post by slowscootin07 on Jun 30, 2008 0:20:47 GMT -5
Ceramic brakes pads aren't 100% ceramic, but a composite. Although I can't be exactly sure what degree of ceramic coating my cylinder has or if it's a composite in the first place, I can be sure that metal breakdown isn't the goal, more like metal settling. The hard break in doesn't just set the rings, but all moving components. At the factory the real initial break-in is done on the motor, but without load. Afterwards it has to be done under load.
|
|
|
|
Post by pannonia on Jun 30, 2008 14:31:51 GMT -5
Thanks for keeping the review going. This is a great thread!
I am using synthetic 75w-140 grade in the gear case. Anyhow, at 85w-140 viscosity the film strength is very good so there is probably no need to use syntetic. My delaer uses 75w-90 during service. The valve check during service did not reveal anything and most likely it will not need adjustment for thousands of miles.
The ceramic lining is a mixture of metal and ceramic particles electroplated onto the cylinder parts. This is not a new technology as cars and motorcycles have been using them for a while, but it is nice to see on a scooter.
For break-in, I did nothing special besides riding with the traffic, and the engine broke in just fine. I am getting 75mpg cruising 55mph most of the time so there is a good ring seal. However, I have been changing the oil every 200 miles and I will switch over to Amsoil or Redline at 1K miles also.
The scooter is almost at the 800 mile mark so I have swapped out the plug with a Denso IU24 and it runs just a tad smoother.
After eight years my HJC helmet started rattling, and smelling, hmm, not so good... It was time for a new one. I ordered a Shoei RF1K and put a dark visor on it. I should have done this a long time ago!
|
|
|
|
Post by Greg on Jun 30, 2008 15:22:32 GMT -5
Hey Shelly im glad to see you joined
Greg
|
|
|
|
Post by terraunbound on Jul 1, 2008 14:45:32 GMT -5
Hey Greg! Great to see your ride!
SYM question: has anyone cleaned their air filter? I live down a very dusty road and it looks like my air filter is getting dark brown (that's bad right?). What's the best method to clean one?
|
|
|
|
Post by slowscootin07 on Jul 1, 2008 16:50:25 GMT -5
It's a paper element type and don't get it wet as it's not washable. If you're careful, you can take it off and blow it out with compressed air. IMPORTANT-- If it is at all ripped, then replace it. Blow only from the back side out. In otherwords when you open the air filter box and see the dirty side, don't blow it that way. Remove the filter from the holder and blow if from the "cleaner" side back out through the dirty side. While you are at it, you may want to clean out the CVT filter. It's made of foam and can be washed with water. A shop/home vacuum with a brush attachment can also help clean it up, but suck it from the dirty side. Basically, you don't want to push the dirt further into the filter. BTW the filter getting dirty is normal and bvy getting dirty is showing you that it's doing it's job.
|
|
|
|
Post by slowscootin07 on Jul 3, 2008 0:35:52 GMT -5
Well, I've breached 400 miles now and I really don't have anything to report problem wise. With the odometer discretion figured in, I'm getting around 72mpg with a mix of stop and go traffic and 65mph highway runs. I've fixed the stupid side stand so it doesn't snap back when a breeze blows by and it stays locked in place in the up or down position. Here's what I did to fix it. Fixing the side stand: I did it I did it!!! OK for all you SYM owners, I solved the snapping side stand problem and it's a very, very easy fix. After no less than five prototypes of locking mechanisms, ball-checks, reverse springs and latches I just about gave up, then it just hit me. Seriously I was so dumbfounded by how easy it is to fix, that I smacked myself in the head. In hindsight, it's SYM that should be smacked in the head for being so stupid in the design. This could potentially work on any scooter with the same problem and I guarantee that it will work for the HD125/200 and the DD50 at least. For those that have a SYM, you know what I mean, for those that don't, the side stand will not lock into place in the down position and is sprung so hard that something as little as a wind gust could let it snap up and boom, down goes your scooter. If you even just slightly push it forward, or turn the wheel, the same thing will happen. It's a stupid, stupid design in my opinion. There are two ways to fix this. The first way is easy and can be done with a Dremel tool, cut-off wheel or even a hacksaw. No I'm not talking about cutting it off, but trust me, I was getting close to that  The second way involves the removal of the PITA (pain in the arse) double spring, reinstalling a new through bolt on the stand and then getting the double spring back into place. Did I mention PITA? Even though I have access to an air powered cut-off wheel and a lifting rack at my shop, not everybody does, so I did it the good old-fashioned way that most of you might have to do. I used a Dremel tool with a standard duty cut-off wheel while I was lying on the ground. I ran out of the heavy duty ones, so it'll most likely take two of them to do it. I've shot a small video below showing how I did it and believe me; it's easier than you think. It’s pretty much real time and I have two versions. They’re both the same videos, but one is 3mb instead of 9mb for slower connections. Mrs. Slowscootin said I should call it something catchy since it'll save a lot of scooters from tipping and keep the air cleaner and devoid of nasty explicative words from frustrated owners worldwide. It may even save a helmet or two from being thrown on the ground all the same when you come to see it down for the count. I couldn't think of anything catchy, so I call it Jeff's Easy Fix (your) Faulty (stand) Yourself method. In short-- The J.E.F.F.Y. Method. :þ Here's what you'll need for the easy method 1) A Dremel tool or other cut-off tool like a hacksaw. 2) Safety glasses 3) A Helper is nice but not necessary 4) 5 minutes of your time at most Basically what you need to do is to cut a ¼" off the stud on the back of the mounting through-bolt for the stand. Watch the video and go at it. Again this is so easy, I can only think that SYM did it on purpose. Why else would a top notch and well-designing scooter manufacturer overlook something so silly? This modification in no way shape or form modifies the structural integrity of the scooter frame or the stand itself. Once you see the video, you'll understand. If you don't want to cut the stud off, then you can do it the hard way and good luck with that. Here are the videos 3mb video www.jeffs-hotsauces.com/sidestand_web.wmv9mb video www.jeffs-hotsauces.com/sidestand_0001.wmvMirrors: Another slight problem that I have are the mirrors and cagers notorious bad habits of driving in my blind spot so I installed rectangular blind spot mirrors of the inner part of the mirrors. They are fine with real good visibility, but I already know what my arms look like and I don't need to see them in my mirrors. What I do need to see are my blind spots and now I can. They're self-stick and quite easy to install. I couldn't find rounds ones that were small enough to work, but the rectangular ones work fine. It’s a quick and simple upgrade for safety purposes in my opinion  Body modifications: Access hole--I drilled a hole through the lower body panel to ease access to that one pesky CVT cover bolt. By doing so, I now don't have to remove a single body panel screw to get the case off. The hole is just big enough to fit the 8mm socket through. Since the plastic panels are gray, I used a red Sharpie to color the inside of the hole to match the body color. Seriously, you can't even tell the difference and it looks like it was made to be there. This simple little modification will save a lot of time when the CVT case needs to be opened up. I started out drilling with a small 1/8th" drill bit and worked my way up to a 3/8th" bit. Drill VERY slowly or the plastic will start to melt and may chip the paint trying to pry it off when cooled. I finished off the size I needed it to be by using a drill and a burr removal bit, again going very slowly to prevent melting, chipping and going in a circular motion.   Accessories-- I have a marine grade power outlet, gyroscopic drink holder and speakers on the way so that'll be the next installment. I do have an MP3 player that will use it's own power, but the amplified speakers might be too much of a draw with the lights in their current configuration. I have a rechargeable battery pack that will power the amplifier for no less than 12 hours. I’m going to keep it in the under seat storage whether I use it for the amp or not. I don’t want to tax the stator too heavily and the extra bulbs are pushing it close. I also have LED bulbs in the works for the tail/brake light, all eight turn signals and may tinker with the two little driving lights in the headlight module. As soon as I get my goodies from US Boats, I’ll get into the next mods for installment five. |
|
|
|
Post by gscoot1 on Jul 3, 2008 21:18:58 GMT -5
Hi Jeff:
I'm a new member thinking about the HD200 and I can't thank you enough for your extensive review and the side stand fix. You're a gem. To share your knowledge and expertise so freely is a blessing to others and you have gone a long way toward convincing me to buy the HD 200.
I'm going to look/ride one on Saturday and if it fits me, I'm a good six feet and 165lb, I'll probably buy it. My biggest concern was reliability and whether SYM was serious about the USA market. Carter Bros is established, but they are primarily a go cart company and the local dealers in this area are mom and pop lawn mower shops and so it doesn't inspire confidence long term.
On the other hand, the price, quality and reliability and configuration of the machine are such that Honda, Yamaha etc don't even compete and probably won't for another year to two years.
I finally decided that if the unit is well built and reliable, then I can get parts from Europe in a few years if SYM should leave the American market, which I don't think is likely. Does this sound reasonable to you?
Also, your locating a Uk dealer that would ship to the US reinforced this thinking for me.
I don't want an Italian machine because of reliability issues and I know in the machine tool area the Taiwanese have made good products for years.
Thanks again for the excellent articles, reviews, tips and fixes and I look forward to your further posts to help us other scooter lovers out.
By the way, I owned a 1985 Elite 250 for about four years until 2 yr ago, and I used it for everything, grocery shopping, errands, everything that I absolutely didn't need my Tacoma for, and that was when gas was still $1.50 per gallon. Only sold it because of age, and parts issues, so I am looking forward to another gas saver, small footprint scooter that is also fun to own and ride.
Take care,
Gerry in Alabama
|
|
|
|
Post by slowscootin07 on Jul 4, 2008 2:04:12 GMT -5
Thanks for the praise Gerry, but I'm not doing these posts for myself. I'm doing them to help others. I'm in no way shape or form linked to SYM and they should pay me for the stand fix -hehe This is a scooter that I trust and believe me when I say I'm really trying to pick it apart and expose it's flaws. The problem is (is this a bad thing?) is that other than minor quirks like trunk space, turn signals and such, I can't find anything wrong with it. I'm pushing 500 miles now and I'm loving it more and more everyday. BTW welcome to the pound |
|
|
|
Post by gscoot1 on Jul 4, 2008 22:20:02 GMT -5
Hi Jeff and thanks for the welcome to the board:
I could tell you are trying to help others and were being fair and unbiased simply by the tone and content of our posts. As a technical person myself, though not a trained mechanic as yourself, I really appreciate your attention to detail and objective evaluation of the entire machine, layout, execution and so on. Your review is many times more valuable than the several review I have read of the SYM and i agree with you that a number of the things you cover would be excellent selling points. Also, yes indeed, SYM owes you for the fix to the stand. What do you want to bet that next years model has this problem fixed, and probably in by removal of the 1/4 inch of metal you so nicely illustrated as the problem?
I totally agree that the quirks you have identified are relatively minor issues when considered against the background of a well engineered and well built machine. Reliability is the top issue for me, first, last and always, so the rest is just gravey (sp?).
When you have time I would really appreciate your thoughts on a few questions such as the following:
1. Have you found Carter responsive with respect to parts issues such as consumables like air filter, belt (what is the recommended change cycle on the belt by the way) and on my Elite the rollers in the tranny tended to wear and need replacement also. Is this something one can expect on the HD200 also and if so, can we get the parts from Carter when needed at 20K miles or so?
2. Do you believe Carter/SYM is committed to the American Market?
3. If something should happen with respect to that commitment do believe one could get parts via the net from overseas, such as the UK dealer that will ship here that you discussed under the section of bulb replacements and a possible rear disc conversion?
With the information you have provided about quality, and the testimonials I have seen from other SYM HD 200 owners, and positive reviews, I wouldn't be surprised if in 3 to 4 years SYM exceeds the 5% penetration of the US market that I read was their original goal when signing the contract with CarterBros.
Again, thanks for all your efforts to inform and assist other quality scooter lovers, they are truely a God send for folks like myself, and I am looking forward to being a SYM HD200 owner in the very near future.
Sincerely,
Gerry
|
|
|
|
Post by slowscootin07 on Jul 5, 2008 23:29:19 GMT -5
Wow, you ask a lot of questions for someone with a bit over 500 miles on it As for the fix to the stand, all they had to do to make it work normally to "my" standards was to put in a bolt that wasn't purposely blocking the stand. It's real popular in Europe that way and as previously stated, this is a US version. I guess they forgot about that, or perhaps not. Here's a little something to consider. Carter wanted only the ATV's and go-karts, but SYM said scooters too or no deal and that is why we're reading this now. As for contact and parts with Carter, I haven't ordered any parts as that needs to be done through the dealer in reality. The dealer will (at least mine) have better channels than Joe Me. I did call them via phone and requested a service/parts manual. I had to leave a message, but in about 3 hours I received a call back asking for my mailing address for the manuals to be sent to. Unfortunately I received the DD-50 manual. OOPS. I called them and asked what to do with it and they said keep it and the right one would be sent. It seems that there was a little mix-up at the brewery and the DD-50 owners got my manual. Hey stuff happens and the right one was in my hands 3 days later. I really can't answer where Carter is going to be and where parts are going to be available or needed at 20, 000 miles because I plain right just don't know. I also haven't heard of any issues yet, so it's hard to tell. The dealer network is expanding and that's a fact, so I've a feeling SYM is going to be around here in the US for quite some time. Parts for the HD125/200 are available for overseas shipment from the UK. There is a big difference though with the HD125. Abroad, they're called the Orbit125/200 and the 125 is air-cooled so it's a different engine altogether. I did find the amber bulbs available in the us for 6.50 each and said, "No way." I solved the problem myself and made my own which are still working nicely. About the rear disk conversion, it's gonna get a little pricey. The current rear rim is ready for the rotor but needs it to be drilled and tapped. The steering wheel is ready for the reservior, but the brake handle has to be replaced. The frame already has the brake line routing ready to go. It really won't be that hard, but here's the downside, the swing arm on mine doesn't have the caliper mounting holes. My UK friend and I are still trying to figure out the details. Time will tell:) |
|
|
|
Post by terraunbound on Jul 6, 2008 19:28:54 GMT -5
Great installment and video - not sure I'm quite ready to do the dremell thing (how's this effect the warranty?) but I am passing in onto the shop and see what their reaction is.
BTW, I've now reached 1200 miles and am averaging 84 mpg on my SYM HD200.
Most of my trips are either riding up and down steep and windy mountain roads (3000+ elevation change) or treks at 8000+ elevation. When I'm going uphill (for 14+ miles), throttle is wide open. So, I'm not babying my scooter by any means.
|
|
|
|
Post by slowscootin07 on Jul 6, 2008 22:32:07 GMT -5
I just went on a 50 mile ride today with the Mrs. and had no problems myself excpet for a bit of sunburn  If I had used my cutt-off wheel it would've been done in seconds. About the warranty being an issue; If SYM would cover the panel parts and such that would have to be replaced or repaired due to a fall because of the stand, then I wouldn't have done it. Actually--Yes I would've. The bolt can be replaced instead of being cut and who would know the difference? I chose the easy way to do it and have in no way shape or form altered anything other than the culprit bolt stud. |
|
|
|
Post by gscoot1 on Jul 8, 2008 1:37:11 GMT -5
Hi Jeff:
Thanks again for the reply/information re Carter/SYM, parts, etc.
I picked up my new 2007 HD200 at the dealer on Saturday. It was the last 2007 that Carter had at one of their stores in Alabama. According to the Salesman, Carter had over ordered the Scooters in 2007 and the market took off a few months after they expected. Thus they had a few 2007 models till early this year. Those times are over, though, as all are gone and the 2008's are selling as fast as they arrive, faster, in fact, as they are selling them out of the containers before arrival at this time, and that is with the substantial price increases that SYM has been posting. Local dealers in this area are quoting $3799 MSRP for the HD200 and that is before shipping, tax, etc. The market seems to be bearing it, and frankly, if the reliability is there, (and I would like to hear from anyone with a 2006 and multiple thousand miles as to this) I think the scooter is worth every bit of it.
I have only had time to ride it briefly. I changed the oil in engine and rear end at 20 miles and then ran errands today to the tune of 40 miles, and there were some shavings/flakes in the first change, just as you noted in your review, so I'm glad I made the early change, based on your review. By the way, I don't think you are changing the oil too much. A little care up front goes a long way, and as you said, I've never heard of an engine being damaged from the oil being changed too often (but I have certainly heard of them being damaged by changing it too seldom.
It is a pleasure to ride and is so solid, responsive and quiet. My prior scooter was an '85 Honda Elite 250, with the 10 inch wheels. It was very quick off the line, but near as stable on the road. No doubt the larger wheels and the front shock configuration make the difference. It just feels so solid on the road, and while I'm not getting on the accelerator hard, it feels nearly, if not as, quick off the line, and also it seems to have a higher top end from what I have read. The roll on acceleration is very nice, and it seems to be loafing at around town speeds. I get the feeling it would cruise all day at 60 to 65 mph, which is fast enough for me. The cooling system on mine responds exactly as you described in your review.
I see quality everywhere I look with only two exceptions. The castings are quite nice, the design, except for the side stand is well thought out and executed as you reported. The only thing I dont like is the plastic grocery bag hook and rack and I have figured out a fix/addition for the rack. I have to work out the details and make a jig, but I plan on building a welded steel rack to mount in conjunction with and to complement the existing rack. It will follow the lines of the body and existing rack, and use the existing mounting points, but will extend beyond the exiting rack to the rear and sides slightly. It will be painted powder coated black and will be designed to allow the addition not only of a good top box, but also saddle bags if desired, and will make the use of bungies much easier. I have designed it in my mind and will execute as time allows in the next few months. If there is an interest, I will make pictures available and offer them for sale to other HD200/125 owners.
Thanks for your thoughts on Carter/SYM. Where did you read that Carter didn't want the Scooter business? I would like to have a link if possible. I had heard from one of the sales people as I recall that the Owner of Carter saw the scooters in Europe and Contacted SYM because he wanted the Scooter line. Just sales hype?
I agree they will likely be around for a while if the word gets out on quality, ride, speed and so on. I was also glad to hear you say that the dealer network is expanding. Does that mean that dealers other than Carter Sponsored Gokart stores are also handling them? ie; are traditional motor cylcle shops also handling the line as far as you know?
I live in a small town in Alambama between Pensacola Fla and Mobile Alabama. There is a local Hardware store/lawmower shop/gocart dealer that is the SYM dealer that is close, but they had none in stock and wouldn't have any for weeks/months. I actually had never seen one before I drove up to the Distributors' store to purchase mine. Also, I called several of the other dealers within 100 miles and they said only the big dealers were getting stock at this time. I finally called Carter's own store in Brundage, Alabama, about 170 miles from here and they had the new 2007 that I bought and some more 2008's due in the store in a few weeks but the cost was of course higher on the 2008's so I took the 2007 since the warranty was the same and the machine, as far as I could tell from reviews I read was essentially the same. One discrepancy I noted was that the owners manual says that the odometer reads in kilometers, but I have found that on my unit this is not the case. When I compared the odometer reading against my 98 Tacoma I found that the scooter reads 10% over the Tacoma odometer which would agree with your observations of an optimistic mph reading on the scooter by about 10%. My check was just a quick check on this and I want to measure it against measured mile markers on the interstate as time alllows.
The dealer where I purchased my unit was a brand new second dealership that the Carter distributor is opening in Dothan Alabama. Everyone there was very nice and helpful, but they are still getting thier act together, which is normal in new operations. They sold me the wrong air filter and I will have to return it. I also purchased a windshield for it, but am waiting on the bracket to mount it as the dealer where I purchased it had the shield but not the brackets. They also offer Shad top boxes at reasonable prices, but were out of stock on the 36 liter units. Shad is making them for SYM and has the SYM Logo on the box. I may opt for a 36 liter box, but would prefer the larger one if possible as the large the box the more usable the scooter in my view.
Oh, if you are inclined to share the European link for parts availability I would appreciate it. Also, thanks again for all the recommendations. The side stand, bulbs, modulator, access hole, etc are all on my short dolist.
I also look forward to anything you have to add as to observations and comments as I find them useful, and I'm going to reread your entire review again as soon as time permits.
Take care,
Gerry
|
|
|
|
Post by halbro on Jul 12, 2008 1:30:10 GMT -5
My HD200 was reported to be on the dock in New Orleans when I paid a deposit about a month ago. The dealer is located in Brundage adjacent to the Carter Bros. factory. The last word I received was that the entire shipment (container) of SYM scooters had to be returned to Taiwan because the VIN number stickers could be peeled off without damage! Consequently, US Customs refused the shipment and it was returned to Taiwan. If you are waiting on a SYM like I am, you may have to wait a few more weeks.
Hal
|
|
|
|
Post by slowscootin07 on Jul 12, 2008 19:21:01 GMT -5
Ouch about the extra delay halbro  without going into specifics I had a layaway on mine for three months and waited another month after that until I got it. I'm sure you'll enjoy your HD, Gerry, and I seriously doubt you'll regret your choice. This is a truly awesome scooter and you're right by saying it seems like it’s just loafing around at in-town speeds. It wants to go and go and 20-50 mph acceleration is a lot more than most cars have; it's instant, quick and with no lag. I regularly take mine on 60-65mph runs during legs of my commute and it doesn't mind one bit. Lynn and I also cruise around a lot in it together all the same and once again, it doesn't care. It's incredible how much the price has increased this year. I originally was going to get an 2007 for $700 less than what you paid and even the Fire Drake (2008) was 3,399 before tax, prep, title et all just a few months ago. Don't feel bad though, because prices all over the board are going up and up. You may want to join the yahoogroups (www.yahoogroups.com) thesymgang as it's for SYM owners. Several scoot dawg members are there and it may not be the busiest of places, but it is growing. Oh and don't forget to call Carter and request a parts/service manual. It's free and you'll have it mailed to you in a few days if you don't have one already and no, I'm not talking about the POS pamphlet owners manual. I agree that the grocery bag hook is functional at best and I use it to hold the top strap of my backpack/book bag and it works quite well since the bag also rests on the floor. A trunk will mount on the existing rack without modifications, but I have been tinkering with designing a metal replacement like you. Most likely that will be a winter project and I have a buddy that is an awesome welder and will machine one up for me for minimal cost but I am quite interested in your design for the saddle bag option. I didn't read about Carter and the SYM requirements anywhere, but have been told by several SYM dealers that it's the case and they really didn't want to sell scooters. Ironically enough, I really doubt that any of the big 4 will sell SYM simply because of the quality and they want to sell their products first. I think for now they'll be at scooter B&M's as a high-end line since they really aren’t cheap. I did get a lot of looks at DGY when I went in to size up a cover for it. As it so happens, it was bikini washday and I literally got swarmed by the sales reps and questions about it. One of them even laughed a bit and asked if I wanted to see a real scooter and I just laughed--- a lot:) BTW, the Dowco Guardian medium-sized motorcycle cover works nicely and has an alarm on it too. DGY sells Honda, Kawasaki, Yamaha and Suzuki MC's, ATV's, scooters and such. They also sell Aprillia scooters and the T-Rexx. I'll post a few pictures of where I mounted the modulator and the wiring changes so it'll be easier for you if you're mounting yours. It took me all but 10 minutes to do so and that’ll be in installment 5 very soon |
|
|
|
Post by Erik3tb on Jul 17, 2008 10:42:05 GMT -5
When can we expect the next update/ installment on this? I'm enjoying both the positive and negatives that you are bringing to light.
|
|
|
|
Post by slowscootin07 on Jul 17, 2008 17:49:34 GMT -5
It should be this weekend or as soon as I get my LEDs in the mail. I have a lot to cover and as you said, both good and bad items will be discussed.
|
|
|
|
Post by slowscootin07 on Jul 25, 2008 10:43:23 GMT -5
I apologize for the delay in bringing installment 5, but it's almost finished and will be up this weekend. Included are several mods as LED's, a cupholder, a power outlet, some new found quirks and upgrades and rear disk brake and front disk brake upgrade plans.
Stay tuned
|
|
|
|
Post by rsp on Jul 26, 2008 17:53:51 GMT -5
Jeff,after reading your reviews and looking at Kymco,Piaggio and SYM, I went with SYM yesterday, purchased a 200HD and a MIO50 for my wife. I love them both. We put 75mi. on them in the last 24hrs.
I think the Piaggio was the best looking, and I really like Kymco, but the SYM was much quicker(0-45mph) the top end is not important to me. I am lucky enough to have a SYM dealer 1 mile from my house and the price was right.
first 2 days impression: quality,quality,quality. all I read on these scooter boards is horror stories(won't start! this is loose, this fell off!!) I spent hours in showrooms looking at all kinds of scooters and the SYM has it where it counts.
Driving impression: the MIO makes me laugh to look at and ride and I think I am going fast until I get back on the 200 and say"wow the MIO is slow."
The 200HD had an horrible hard ride when I drove it home from the dealer which I didn't remember while test driving so I checked the tire pressure---58psi in each tire. quick fix, but I do want to adjust the shocks to experiment with rides.
question: what size allen wrench does the rear shock take(5mm was to small and 6mm to big?)
|
|
|
|
Post by slowscootin07 on Jul 27, 2008 18:15:59 GMT -5
rsp-- I t think it's a 7/32, but I'll have to check. I've been going back and forth a lot between just 2up riding and me so the hole is starting to show some wear. I'm going to look into a wrench for the top to help. In case you missed it, be real careful with that heat shield Here’s the fifth installment of my review and I’ve just breached 900 miles. As with the last couple of oils changes, I haven't seen any more metal residue and there hasn't been any consumption of oil. I haven’t had any problems mechanical wise with the exception of a finicky horn but more on that later. I’ve also made a few more upgrades like a cup holder; LED’s, installed a power outlet and a bit of fuse-box rewiring. I’ve pretty much put the stereo on hold for a bit as I’m concentrating on clearing up a few bugs and working on getting the rear disk upgrade together. As a quick note, I am thoroughly enjoying the REAL functionality that my side-stand now gives me after I fixed the purposely-bad design. High Speed Handling: This scooter has really seemed to smooth out a lot and is running like clockwork. I’m now keeping track of my mpg and depending on my travels is anywhere from 68-81. I do a lot of short highway jaunts on my commute and it handles quite well for a 297-pound scooter. I’ve found that I’m more comfortable in high speed co-mingling with traffic on the highway than in the below speed limit beginnings or middles of our lovely traffic jams. It kind of sounds bass ackwards but it’s true. When everyone is going his or her speed, then everything is ok. Cut that speed down and begin traffic, then everyone wants to lane change, lane change and lane change to get there faster and they start to get frustrated. That is when it’s most dangerous for a 2 wheeler and cagers are more likely to make fast and unpredictable maneuvers. I don’t like the semi wash effect at highway speeds and I try to make it an effort to stay away from them-haha… Semis are all around here and you will encounter them regularly so the best thing you can do is to practice. It can be a bit scary, but as long as you don't fight it and over/under compensate, it can be done safely. I can do 75 mph so rarely does one pass me and that’s the best way to avoid the “wash” other than not going on the highway at all. Passing a semi at speed is nothing compared to one passing you. Either way I try to avoid highway travel and stick mostly to secondary roads but I do ride the gauntlets occasionally. Even the secondary roads are 45-65 mph (35-55 legally, but again-ha ha ha; you have to keep up with traffic around here or else.) I guess to sum it up; the HD200 handles quite well in higher speed traveling and it doesn’t mind at all as long as you are comfortable with it. At a bit over 300 lbs., Lynn and I can max out at 70 and cruise 65 no problems. One advantage that I really like about the HD200 is the height that my eye level is at. I can see over most cars and that means that most cars can see me too. Before I get further into the review I have to add that Carter Brothers has totally revamped their website www.sym-usa.com and it is quite impressive with the exception of a few glitches. I especially like that the manuals are now downloadable in PDF format. A custom fitted windshield is now available for the HD series and I'm going to examine it further and may have one installed by the time the sixth installment comes around. They are also advertising the CityCom300i availability in the US. One ouchy-ouch is that the HD200 MSRP is now $3,798 and that's $399 more than just two months ago. Here's Carters' new site. www.sym-usa.com/Disk Brakes: as you may or may not know, the US version of the HD200 is equipped with a drum rear brake instead of a disk. What you may not know is that the front caliper on the Non-US versions is also a dual piston design. The US is also paying from 700-1000 more than the rest of the world for the same scooter. The HD125 overseas is a totally different engine as it’s air-cooled, and nowhere near the performance of the HD125 US model, which is water cooled and basically the HD200’s base engine design. They’re also called the Orbit in the UK, but otherwise the HD200 is the same all over the world except of course the brakes, the dim/on/off headlight switch and turn signals. I’ve been in contact with Carter Brothers in regards to obtaining parts for the disc brake conversion and they couldn’t help me, but forwarded me to a rep at Moore, Large and Co., the UK distributor. From there I was referred to the SYM dealer in the UK. I asked for overseas parts shipping availability to the US and yes they will ship whatever is needed. Link to Moore Large and Co the UK Distributor Chas Mann Motorcycles-UK Parts Mark Andrews is the contact at Chas Mann for parts and he’ll be happy to send parts to the US. Here is his email. chas.mann@hotmail.co.ukIn all honesty, our UK brethren reps could not understand why we get the “sucky” brakes but yet the HD200 in the US was more expensive. I’m still trying to get a parts list together and believe it or not it’s quite simple with the parts, but is going to take some labor and it won’t be cheap to convert the rear to disk. The first thing that has to be done is to get the rear wheel machined and threaded for the rotor placement. The rear wheel is ready for it and it will be cheaper than replacing the rim which has a totally different CVT/clutch case design drum vs. rotor. The cheapest and most beneficial way to upgrade the rear brakes is to get the existing rim worked on. The drum brake will have to be disabled sort of, but fear not, you can use the old cable to create a third brake for parking or extra security to lock the wheel. Since the handle bar has to be replaced, you can cut it and use it as a base (working on that idea.) I know it has to be replaced since they are of two different mounting designs for the brake reservoir. One disadvantage of swapping the handle bars is that the US slug eye turn signal mounts are not present and you’ll have to use the pre-wired ones on the steering wheel unless you weld the mounts on the UK version. The next and last obstacle is the right side swing arm doesn’t have the mounts for the caliper. One SYM rep in the UK said the engine crankcase is a whole different design and it would not work. I don’t buy that and I think he was referring to a whole swap out of the rear transmission. I’m still awaiting the tech guru’s response to see if in fact the right swing arm is the same or totally different. Worst-case scenario is that I’ll have to get a bracket tigged on the existing arm since it’s aluminum. If there’s a screw up, then I know I can get a replacement from Carter. The only other parts needed are the reservoir/master cylinder assembly, the line and the caliper, rotor, pads themselves. It’s definitely going to take a little work, but it shouldn’t be too hard. There will be a bit of rewiring needed to get the brake switch swapped too. BTW, I’m not going to tap the rim and that is a lot of the cost to the tune of about $250.00 if I take the rim off. The front caliper swap is a piece of cake and no modifications are needed according to comparisons. I’m going to do that swap first since it’s the easiest and that will definitely be part of installment six. Problems:Horn: Ok so I’ve had my first problem and you may or may not have it yourself, but be forewarned. I just so happen to have a bad horn. It sounds superficial doesn’t it, NOPE. I’ve used my horn before and am quite impressed by its sound and attention getting, but one day I hit it and it sounded quickly but stopped. I thought, crap, I’m going to have to get a new one, no biggie. What I didn’t realize is that is blew the fuse too. That particular fuse also controls all the lighting and I mean all the lighting and gauges. I happened to look and see them at “zero.” I went to pull over later to check it out and realized I had no turn signals. After I stopped, I then saw I had no lights at all-- nothing. To get to the fuse box, you have to remove the seat bucket and that takes a 10mm socket, not a wrench, and a Phillips screwdriver for one screw. I replaced the fuse and tested the horn and it popped the fuse again. When this fuse is blown, it will also disable the starter too and you are dead in the water if you don’t have a spare and you can’t pull another one for a temporary replacement. As a future precaution, I’m going to rewire the horn to a separate fuse and add a relay so I may add a second horn if I so desire. I’m not happy with being temporarily stranded due to a freakin’ horn and it should have a relay or it’s own fuse. I received a new one from my dealer free of charge, but it’s not an OEM and it’s a Stebel Magnum. A very nice horn, but it won’t fit so don’t even try. Besides, it sounds like a car horn and I’m not driving a car. I really don't want to honk the horn and have someone look for a car instead of me. The horn is a simple Toyota Camry Hi-Tone EDIT-- It didn't fit so I had to get a regular Generic 110db horn and I already replaced it and will pass on the Stebel. Nonetheless, I will be splitting the horn to its own fuse shortly so I don’t have to deal with that problem again. New Accesories and Modifications:Cup Holder: I’ve installed a cup holder like the kind I have on my boat on the center column as shown in the picture. I did put it slightly off center to the right for ease in stepping through from the left. It works very well and will hold a 20 oz. Dew in it. Since I wear a full face, it is nearly impossible to take a drink at a stoplight. (NEVER while riding.) I take my knife and poke a hole in the cap and use a length of aquarium tubing that is attached with Velcro to the column. I was stopped at a light and did so and a fellow two-wheeler said that was F'n awesome and immediately started looking at his MC to see where he could mount one. I could see that he really couldn’t see anywhere to do it and he seemed a bit jealous. Admittedly, scooters have far better mounting options than motorcycles do unless it's a Goldwing of sorts.  Accessory Outlet: Accessory Outlet: I mounted a Sea Dog line Marine accessory plug ($4.00) on the column as shown in the pictures. Be real careful where you mount it, as there really aren't too many places you can do so without interfering with the cooling. You pretty much can’t mount one on the right due to the radiator lines. The coolant reserve tank gets in the way any further up from where I mounted it. You can put in below in the floorboard area (black) or you can mount it on one of the front halves below the front seat. I ran the wires down into the column, drilled an access hole in the battery box and directly attached it to the positive and negative terminals. I did put in an online fuse on the positive side to trip in case of an overload. This outlet will also serve as a float charger receptacle. It isn’t wired into the ignition and is “hot” all the time. This could also be a jump-start point as I used 16-gauge wiring and will soon have a lighter-to-lighter plug in my tool kit. Believe it or not, I didn’t remove a single panel other than the battery access and the VIN door to do this. I used a hanger bent to a slight curve through the VIN door to fish the wires through. After that, I slipped a wire loom over them and up and the wiring. Every harness and connector on this scooter are very well thought out and protected, so I did the same and professionally mounted all items using waterproof connectors and rubberized military specifications electrical tape and encased in plastic wire loom.  And now for the real goods, LED’s LED Lighting: As you may already know from my previous installments, I've removed the dummy turn signal bulbs, created my own amber ones and added them to the turn signal system. I could see the headlight dim slightly when they flashed as the four turn signals per side were creating a 40-watt draw and I wanted to stop that. Since the HD200’s lighting system is fully DC current running or not, I went to LED's without any rectifiers needed. In fact, there is a pretty large rectifier already in place underneath the seat bucket that does the job already. The head light no longer dims with them in place. I didn’t mess around and bought quality bulbs from www.v-leds.com and I got them cheaper through their eBay store. I spent $122.00 with shipping and have a few left over. The majority of the cost was for the tail/brake light. They cost $50.00 for two. $122.00 may seem much for lights, but remember, I have eight turn signal bulbs total and the marker lights were just a dollar each. Turn Signals: The slug eye socket turn signals on the front and rear were a piece of cake to replace. I used an 1156 style amber 24 LED designs that fire with 18 to the rear and 6 in a radial pattern. I did this to project forward/rear lighting by using this style. For the rear lens turn signals, I used an 1156 amber 18 LED radial design with 3 of the firing to the rear and 5 banks of three in a radial pattern. I used the radial style bulb in these because the lenses are clear and I wanted to illuminate the lens’s reflective casing itself instead of projecting light rearwards. Also by using this style in the rear signal mounts, they radiate side-firing light too. The front steering ones are a different story and I’ve yet to find one to fit into the opening of the socket. If I can’t find a radial style for them, then I’ll have to enlarge the whole and make a new mount. There is space in the lens, but not enough to get it through. For the time being, the regular amber bulbs are still there. PROJECTOR TYPE  RADIAL TYPE  They do flash a bit faster now due to the lack of a load and I find it better. The clicker doesn’t sound anymore either, but that’s ok because it’s real loud and it bugs me. I’ve been riding enough to know that the signal has to be turned off and when. I’ve also found out that if I leave one regular bulb in the front and rear, the clicker will work and the signals don’t go faster. Tail/Brake Light and Modulator: The LED used for this light is a 60 LED radial and rear firing bulb. It is a SMT style (Surface Mount Technology) and has 48 radial LED’s and 12 rear firing ones. It’s an 1157 style, its coloring is red and let me tell you, is fills the lens with light very nicely. As written before, I have a modulator on the brake light and now it works way better than on the regular bulbs.    Other LED’s Added: Other LED’s Added: There are three 1194 style bulbs on the HD200 and they are the two marker lights and the license plate light. I replaced them all with inverted cone single diode type. These are designed to fire radially and are perfect to light up a reflector. The original marker lights are definitely brighter during the day, but at night the LEDS add a definite difference in visibility. The original incandescent ones blend into the headlight at night, but the replacements add a definite abstract and I like it. I still have my temp tag and the rear bulb doesn’t light it up like it should, but once the reflective plate is there, it will.  The video below will show all LED lighting mods in action. Notice that the front turns that aren’t LEDs flash a bit slower. 3MB wmv file www.jeffs-hotsauces.com/ledturns.wmvI also swapped for an Iridium plug at 500 miles. Here’s the kicker about that. I called local MC shop and they had one for $12.00. Two miles down the road, an auto parts store had one for 6.98—hmm, nice markup and I wonder where they got it. I didn’t notice any differnce in the plug swap, but it will last longer than the stock one. Since the trunk is barely good for one helmet, I’ve decided to turn it into storage only. Within it I have my tools, locks and such. It includes a whole lot of stuff includind a first aid kit, a ¼ ratchet, extensions and sockets, a bit driver with various bits, fuses, duct tape, electrical tape and connectors, test light, spare safety glasses, bungees, LED flashlight, air gauge, and a bunch more. I use zippered cases to protect the contents from bouncing around and have lined the bottom with a thin layer of foam. Well, that about sums up this installment and I know I’ve forgotten something. On the drawing board for the next one is going to include the bottom line on the disk conversion. Another few ideas are an adjustable and removable radiator vent director. Once the cooler weather hits, I want to direct that heat up towards the handgrips. Now that the LED’s are in, a plan for an amplified stereo may be back into the works. Bottom line is that I really am trying to pick this machine apart and expose it’s flaws. Other than the little things, I still am 100% impressed with the design. Oh and last but not least, here’s a picture of the Gremlin Bell that my sweetie bought for me. The Fire Drake wears it with pride. And here’s another pic. of the key chain I’ve been using on my two wheelers since 1982.   |
|
|
|
Post by bluebandit on Jul 28, 2008 13:16:20 GMT -5
slowscootin, Great info. .. Just purchased A new Hd200 last Thursday, and have been making mods to the bike...Dealer let me take it before the bike was put together and started.
Out of the box mine had the horn problem. Will take it back to the dealer to fix this.
I do plan on moving the fuse box, since it is a pain to access it and have started working on removing the horn from the lighting circuit.
I ordered LED's for my rear lights this weekend, for the rear blinks and tail/stop light.
I have not been able to access the front blinks. I can not get the panels off the handle bars...What is the secret??
I want to get all the modifications complete on the bike before I start riding it, so other than getting it running, I have yet to ride. I am trying to decide the best way to break it in before riding.
The SYM HD200 is a great scoot, built with quality, and is the best I have seen so far. Thanks for the great review
|
|
|
|
Post by slowscootin07 on Jul 30, 2008 7:33:00 GMT -5
You are going to have a hard time removing the cover totally, but I was able to crack it open and remove the bulbs and replace them without totally taking it apart. I have yet to find LED's skinny enough to fit into the handle bar mounted signals, so I may have to alter the casings themselves. Concentrate on removing the one that faces you when you ride. (PS mirrors have to come off and the case halves are snapped together. You'll have to use a plastic spatula or dashboard tool to help split them apart. I'm going to keep my fuse box where it is, but make an access panel to it in the trunk cavity. I've already seperated the horn from the main lighting and it has its own relay and fuse now. I may add another horn if I can find the space.
As for breaking it in, it's your choice, but I rode mine like I stole it.
PS, don't forget to fix that pesky side stand
|
|
|
|
Post by rsp on Jul 30, 2008 8:19:16 GMT -5
How many screws hold on the tail lights? I see the 2 obvious ones in the lens housing but after that are there screws under the fender also that have to come off. I can't get mine off??
|
|
|
|
Post by slowscootin07 on Jul 30, 2008 14:09:51 GMT -5
There are only two screws and the case is sealed in place with a rubber weatherstrip. it will probably break like mine did, but will still be usable. rock it a bit left and right, then up and down. There is a small tab on the top that has to go under the rear panel. To get it back on, you'll have to squeeze the sides by the turn signals to seat fully into the body. Make sure that it is in all the way before you retighten it too.
|
|
|
|
Post by rsp on Jul 30, 2008 14:33:05 GMT -5
thanks again for all the useful info.
|
|
|
|
Post by slowscootin07 on Aug 15, 2008 16:36:29 GMT -5
Welcome to part six of my ongoing review Well, I've breached 1000 miles now, just over 1400 to be exact, and haven't had a single issue except for the horn. I've opened up the CVT case and have found very little, if any, evidence of belt wear and only a light dusting on the inside. On further review it looks as if the variator will have to come off to replace the belt as the clearances are too tight. Ugg, I was hoping that the quick method would be able to be done, but I guess not. when I do have it off I will further check to see if it's a Dr. Pulley variator like it's supposed to have but that's still several thousand miles away. I still can't find that link where I saw it, but supposedly SYM makes the Dr. Pulley variator. I can neither verify nor deny it and I'm still looking for it. I have switched to Mobil 1 full synthetic 10W-40 in the crankcase due to the higher temperatures over our summer. According to the SYM manual, 10w30 minimum is recommended up to 90° and 10w40 if temp could exceed 90. I'm sticking with dino 85w140 in the gearcase since there isn't a synthetic available. I can find a 75w140, but that's not good enough for me since it only has 3½ oz. in it in the first place. Once cooler weather hits, I will go down to a 75w140 dino, but I'm not going to switch from dino to synthetic, then back to dino. For those that change their own oil, I have a tip for you and please have someone help you. Don't use the center stand when you change the crank oil but use the side stand and here's why. Oil Change Tips:1) Using the center stand is messy, as you may know, since the oil comes right out on it. If you haven't fixed your side stand, as I've previously explained so it doesn't snap back, then you'll definitely need a helper. I can do it myself and obviously I have fixed the stand and can do it solo since I did so. 2) Drain the oil out normally and after it's done coming out, tilt the scooter to the right and you'll see more come out. Wait for it to stop, let it rest back on the side stand and do it again 3-4 more times until it's done dripping. This will remove about another 200cc's of old oil. Since the capacity is only 800cc this means that by doing this will remove about 20% more of the full capacity and will permit you to put more clean oil in the engine and get more of the old crap out. A whole quart is 946 ml or .946 liters and now it will take it all. Another plus side is that you won't have a bunch of part full bottles left over to combine. 3) After you reseal the plug, place the scooter on the center stand and put the whole quart in. It should be filled to it’s capacity now, but do it slowly and check it every once and a while so you don’t over fill it. After it's filled to capacity, keep the kill switch to OFF (non-running) and crank the engine for a few seconds. Turn the ignition off and re-check the oil level. Since I'm now using synthetic, I'll be changing my oil every 500-700 miles instead of the 200 that I've been doing. My oil change reminder light turned red at exactly 1000.0 miles. I did reset it a few times initially and have now found out that you can’t reset it until it has turned red. Exhaust:I’ve found a little secret and I’ve been toying with the idea. There is a single bolt to nowhere on the exhaust pipe before the muffler. It could be an outlet for an oxygen sensor on the “i” models overseas, and just plugged here. I’ve removed the screw and it sounds definitely louder, perhaps a bit throatier. It’s not obnoxious, but it does double the sound and it splits the exhaust. I did infrared readings on the muffler and it runs cooler. The "catalytic converter" is in the rear of the muffler and runs over 50 degrees cooler. I haven’t noticed any lack in performance and actually have noticed a small, but slightly noticeable increase in on the roll throttle response. The down side could be a leaner condition due to lower back pressure and I'll be doing a plug reading soon to see if that's the case. My guess is that this would be about how it would sound with a performance muffler on it. BTW- MRP makes a performance direct bolt on replacement for the HD200 to the tune of $400.00. Horn Re-Wiring and Relay Addition: As stated in the previous installment I had a problem with the horn and it seems that there are quite a few others having the same issue. As of late (8-13) it seems that more and more people are having this problem on the HD's It isn't a wiring issue or a short in the switch, but the horn itself is faulty. I know this because when it's in "short-out mode," it will pop the fuse. After you replace it and tap the horn itself with a screwdriver, or even your finger, the horn will operate normally; but for how long and when will it fail next??? There is a SYM rep from Carter Brothers that would like the following information forwarded to him if you've experienced the problem so he may notify SYM of the issue. It may be that there was a bad batch since he would like the Engine number, VIN, date of purchase, miles, etc... He is an active member in the Yahoo Group "thesymgang" and monitors the boards regularly. I would suggest joining the group if you haven't done so already and own a SYM product. The relay really isn't needed for a single horn but is a nice addition in case you want to upgrade to dual horns which will require a relay. PS- Good luck finding a place to mount a bigger or seperate horn under the front cowl-really. There is barely enough room to mount the current one as it is and even a ½" larger horn will not fit. I've found a location to mount a larger horn, but is on the bottom of the scooter behind the battery box. Since no one had bitten on the Stebel Magnum horn I had for sale, I mounted it there along with the meep meep horn. Let me tell you, the combo is quite loud and attention getting. I mounted the relay and the separate fuse in the dummy rectangular access panel that goes to nowhere under the seat . Either way it will ease wear and tear on the horn switch contacts so it's not a bad idea and isn't too difficult to do. I used a spare Hella relay that I had- Model number 4RA 003 510-08, but any generic horn relay will work. The relays are generally numbered with the contacts being 30, 85, 86 and 87. Since SYM uses a positive powered horn switch on the HD instead the more common negative switch, I had to wire it a little differently. 30 goes to the "+" terminal on the battery directly and is fused then it goes to the horn switch, 85 goes to the other contact on the switch, 86 goes to a ground source and 87 goes to the horn. It doesn't matter which contact on the horn or switch you go to since polarity is not an issue. These horns can be connected "backwards" as long as one is positive and the other is negative. The only wiring modifications needed to seperate the horn from the lighting fuse is to cut and cap off the wires coming to and from the horn switch and disconnect the wires to the horn. This way I don't have to monkey around with the main wiring harness and it is kept as is. The circuit horn is live at all times and will make it easier to wire in my upcoming alarm system. Another thing to note is just because the circuit is live at all times, this WILL NOT drain your battery in any way shape of form. I used some spare wire leftover from re-wiring my boat trailer lights. It's a 16 gauge, 4-wire flat cable and is oil/gas and water resistant with different colors for ease of placement and future trouble shooting purposes. Of course I also used military grade electrical tape and wire loom in the routing. Just like when I added the accessory plug outlet, I wanted to keep everything professional and in par with the excellent wiring tactics and routing that SYM uses. IMPORTANT!!!! While mounting the second horn near the battery I noticed that the rear brake cable outer shielding is rubbing through on a frame bracket. This isn't the actual cable itself, but a protective cover. I can see that eventually it will rub through and then proceed to the cable housing so I zip-tied some spare hose around the contact point. It's quite easy to see once you remove the battery access panel on the floorboard. Fusebox: I carefully bent the fusebox holder down from it's vertical position to a horizontal position for ease of access through the hole I made. If you remove the starter relay right next to it first, you can bend it down easier. Instead of removing the horn from the fuse wiring itself, I cut and heat shrink sealed the wires and ran new ones to the horn, switch, relay and fuse. Since I didn't remove the existing horn wiring from the fusebox, I can use the wires that I capped off, add another switch and use it for auxillary lighting or whatever floats my boat at a later date. Adjusting the Shocks: Originally I mentioned that I use a hex wrench to adjust the shocks when switching from me and 2 up riding positions. What I forgot to mention was the size and the fact that I slightly rounded the corners for a snug fit. Well, it's a 7/32", or you can do the same to a 6 mm wrench. The holes are starting to show the beginnings of wear so I searched for a new tool and found one. I know there are a lot of different things you can use and please, I'm all ears for a better suggestion. Currently I use a tie rod tool that fits around the shock itself and it works great. I got it through my Matco tool dealer, but it is a OTC brand part number 7097 and cost about $30.00. It fits in my tool bag and is a lot easier and safer to use than the allen wrench. The local MC shop wants 65.00 for a tool that adjusts the shocks--BS! All it is is a generic spanner wrench and it won't fit the left side shock anyway due to the airbox. I've also found out a bit of a goof and oversight on my part and that's the weight capacity of rider and/or passenger. This is BIG, ladies and gentlemen, and may affect your decision on purchasing one. According to the manual and the website, the maximum weight of a rider and or passenger is 242 pounds. Now I'm a lighter guy at 160-165 geared up and wet so it doesn't affect me one way or another, but that pretty much means that 2-up riding is out of the question and if you're over 240, then you're not supposed to be riding this scooter at all. Another note to add that even the RV 250 has a weight limitation of 242 also. Upon even further review, all of the 50cc SYM scooters also have a 242 pound weight max.Typo perhaps??? Nonetheless, Lynn and I are pushing 50 pounds over the weight limit with no problems evident and I'm really going to look into this further without a doubt. LED Lighting Addendum: I've found amber LED turn signals that will fit in the steering column enclosures so I won't have to modify them to fit. All lighting with the exception of the dash lights and the headlight are now LEDs. Windshield and Column Turn Signals: A lot of people have been asking me on how to take the cluster halves apart to swap the lights or to take off the little windscreen so a windshield can be added. SYM now offers a custom windshield for the HD's, but the little one has to come off first. I had one person go as far as the dealer telling them to just break it off--WRONG and I wouldn't go to that dealer again. It is quite easy and should only take you about 10 minutes to remove it and here's how: 1) First you have to remove the mirrors and the slug eye socket turn signals. 2) Remove the 5 screws on the back (gauge) side of the column and remove the one screw on the front side under the little bug screen. 3) Using a plastic spatula or dashboard tool, gently pry at the locations shown as there are four locking tabs that the halves hook into. The outer half is the one that will fall free, but it won't fall off since the is wiring holding it on. This is also what I did to run the new horn wiring and to rewire the switch. Be real careful as the tabs and aligning "tabs" are fragile and will break if manhandled. I know this because I broke the outer one on the right side. Don't worry, it won't affect stability or performance of the console half, but it won't be aligned 100% if they break. 4a) For the bugscreen, there are 4 gold colored phillips screws holding it in that are easily accessible once the console is apart and you can't miss them. 4b For the lights, you now have easy access to them. One thing of note is that the bulbs/mounts are not like the normal bayonet type with the tabs directly across from each other, they're offset. You will have to file down one of the tabs (it doesn't matter which one) to get the bulb to fit into the socket. Tool Kit: Here are some pictures of the tools I carry in my tool kit and a description. ¼" ratchet and a few extensions 4-13mm socket set Bit driver with several spare duplicate attachments Pliers Vice Grips Adjustable wrench Plenty of spare fuses and fuse puller Electrical tape Duct tape Wire connectors Spare wire Electrical tester First aid kit Two tinted safety glasses Two clear safety glasses Shock adjusting tool LED flashlight Spare plug and plug removal socket A Widow's Mite (for good luck) Bic lighter & some emergency smokes Emergency contact information (laminated) Zip Ties 3' of vacuum/fuel hose Tire gauge Helmet lock (actually a gun barrel lock) (not shown) 10' cig plug to cig plug "jump start cable" A few other items that will be added soon are a cdi and a coil. There's really no need to have a spare belt since the design of the CVT case will not allow you to do a field replacement unless you pack an impact wrench and a puller too. Well, this about sums up this review and I do apologize for not having the rear brake conversion specifics done yet, but trust me when I say, I will get them shortly. I've re-designed the FireDrake's home page to make it easier to navigate through. Pictures of this review are posted in picture page 6. I really do enjoy this machine and still think that it's worth every penny I spent for it. Here's the FireDrake's new home page. There still are a few kinks, but I'm working them out. www.jeffs-hotsauces.com/firedrakehome.htmHere's a quick link to review six pictures www.jeffs-hotsauces.com/firedrake6.htmThank You for your time and once again, please feel free to ask any questions or post your comments. |
|
|
|
Post by irish44395 on Aug 20, 2008 14:45:13 GMT -5
Slow
I did the fix on the side stand . After work I rode my scoot into the shop took the cutting wheel and was done in no time . I put on my helmet and rode out the shop and home then remembered I didn't turn of the compressor . It my job to close up the shop but I was so excited I forget there goes all the ataboys I have been earning. Now I can use my side stand
thanks slow
|
|
|
|
Post by slowscootin07 on Aug 20, 2008 22:56:56 GMT -5
I could've used the cutting wheel too and been done in literally a few seconds. I did it the slow way since everyone knows someone that has a Dremel tool so it's possible to do it yourself. Congrats on fixing it and it is a wise one to do. BTW unless you have leaky lines, the compressor will stay off until the lower pressure kicks it back on. Hope you don't get too lambasted for the compressor  |
|


 The second way involves the removal of the PITA (pain in the arse) double spring, reinstalling a new through bolt on the stand and then getting the double spring back into place. Did I mention PITA?
 without going into specifics I had a layaway on mine for three months and waited another month after that until I got it.

