|
|
Post by fieroboom on Sept 11, 2012 14:13:06 GMT -5
Hey all, just wanted to get my build/mod thread started so hopefully I can offer some ideas & get some opinions!  I recently purchased a Leike Super Hornet from a co-worker; it's a GY6 150cc scoot in the shape of a 3/4 size crotch rocket. Here's a list of things the previous owner had already done when I got it: Engine: - NCY 30mm Aluminum intake manifold
- Upgraded the carb from a 24mm to a 26mm Keihin (still CV carb)
- K&N Air Filter
- High-Voltage coil
- NGK Iridium spark plug
- NGK Spark boot
Running Gear: - Replaced tires with Avon Viper Strykes front & rear. Went with a slightly wider rear: 140/60-R13 (up from 130/60 F&R)
- CVT cover modified to allow more airflow
Electrical: - All ground points & ground wires replaced & upgraded
- +12 main harness line fuse upgraded with blade type fuse
- Swapped out almost all stock bulbs for LED bulbs (except DRLs, Tag, & rear turn sigs)
- Upgraded the headlights to 35W Xenons (still have the stock 8-pole magneto)
- Added small front turn sigs (LED) because the large stock ones had many LEDs going out
Aesthetics: - "Clip-on" style handlebars
- Driven brand racing grips
- Chrome driver foot pegs
- Rear outer fender clipped below tag
- Rear inner fender removed
- Painted the entire body (except the front fender) matte black
- All plastic "grills" replaced with expanded steel (real grills)
And this is how she looked when I got her: 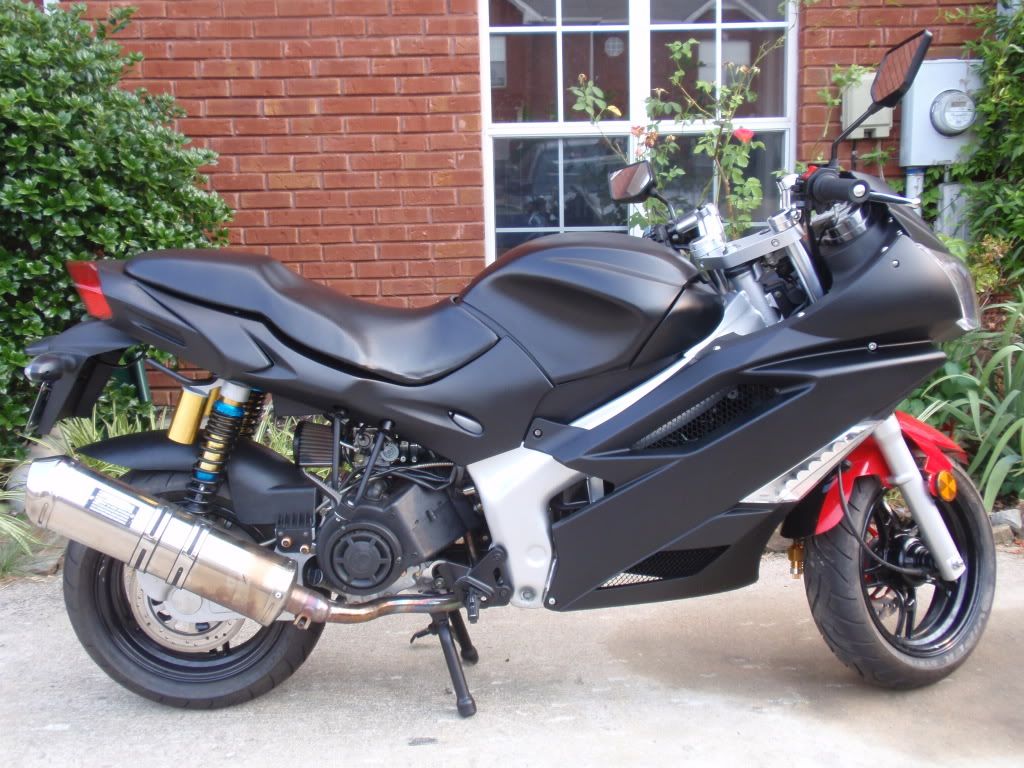 |
|
|
|
Post by fieroboom on Sept 11, 2012 17:52:28 GMT -5
When I got it, this is what I did right away: - Painted the front fairings & front fender in the original pattern, but with black & yellow
- Electronic choke (enricher port) delete
- Removed the center core restriction from the muffler
- Re-jetted (many times) making my own jets
- Dropped the in-frame gas tank down 4" (more on this subject later)
And here is how she looks now: 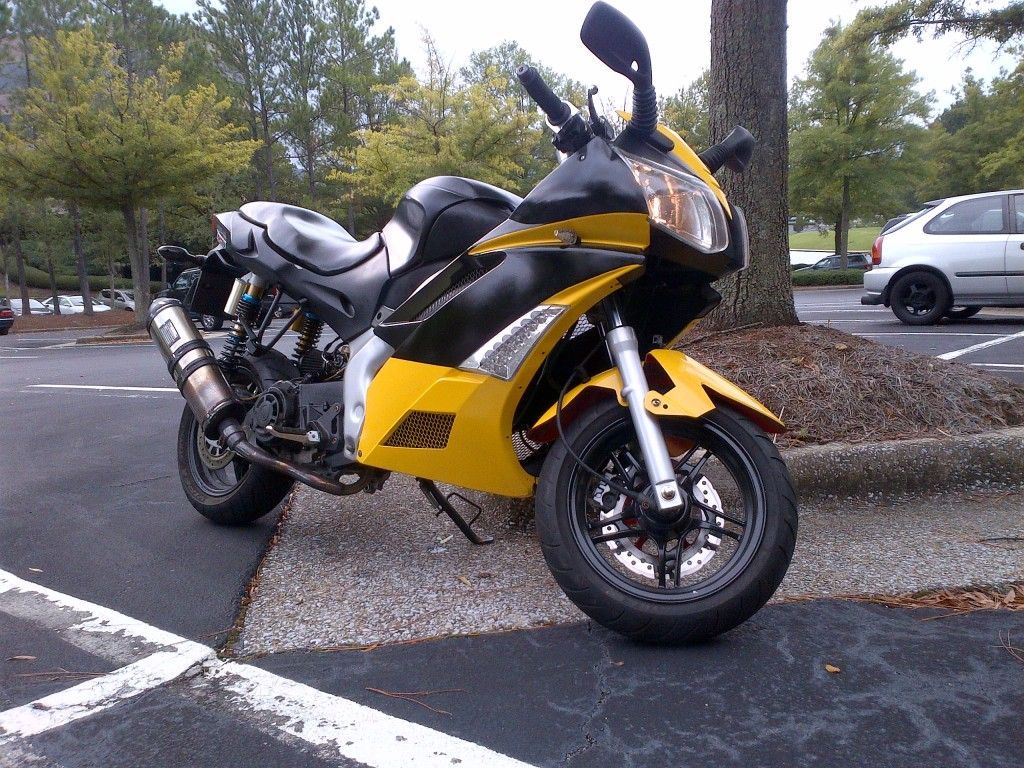 |
|
|
|
Post by prizmm on Sept 11, 2012 18:08:30 GMT -5
sharp ride dude
|
|
|
|
Post by fieroboom on Sept 11, 2012 18:57:35 GMT -5
And this is (so far) what have in mind for the near future: - Relocate the carb up front with a cold air intake tube and semi-ram-air setup
- Open up the muffler and pack around the center tube with fiberglass/muffler packing
- Frame stretch (move seat back 3", extend swing arm 3-5", and maybe stretch CVT case 2")
- Move all electrical components up front between front fairings to increase under-seat storage
- Adjustable CDI
- Complete LED light swap
- Trim more off the rear tail light/outer fender assembly
And in the not-so-near-but-not-so-distant future: - +2 Stroker crank (goal is to go from current 8.8:1 compression to at least 12:1)
- Head port & polish and valve job
- Convert current CV carb to slide carb with capability to tune without re-jetting.
- Much more that just isn't coming to me right off
|
|
|
|
Post by fieroboom on Sept 11, 2012 18:58:15 GMT -5
|
|
|
|
Post by fieroboom on Sept 11, 2012 18:59:22 GMT -5
Playing around with some graphics ideas: 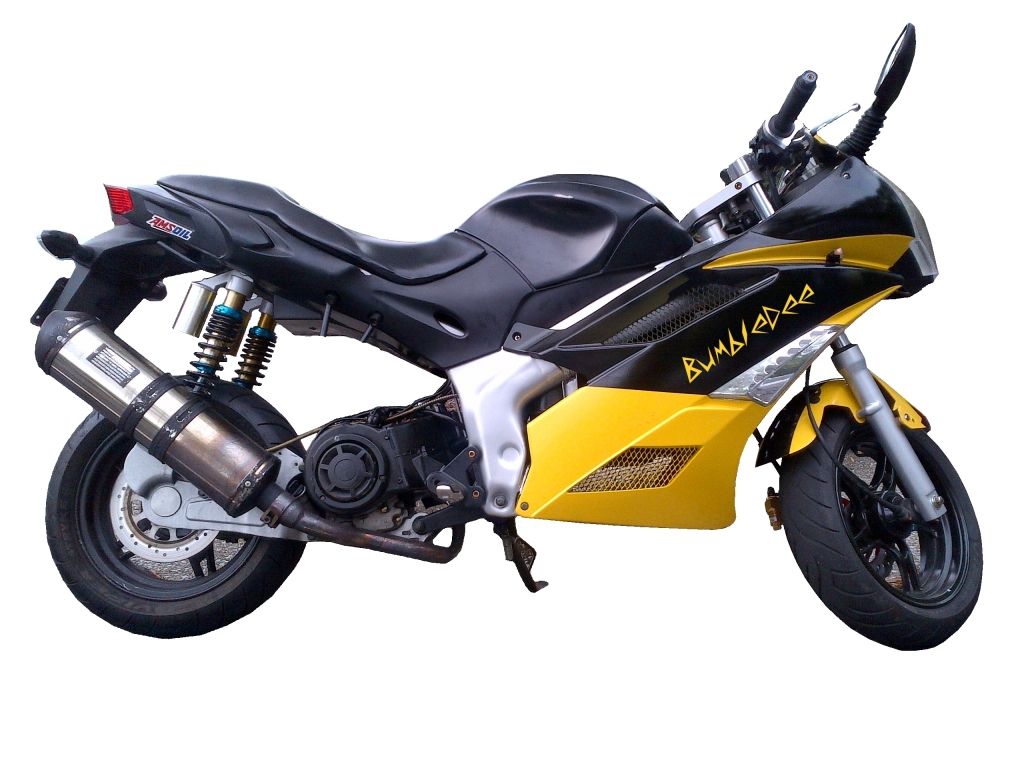 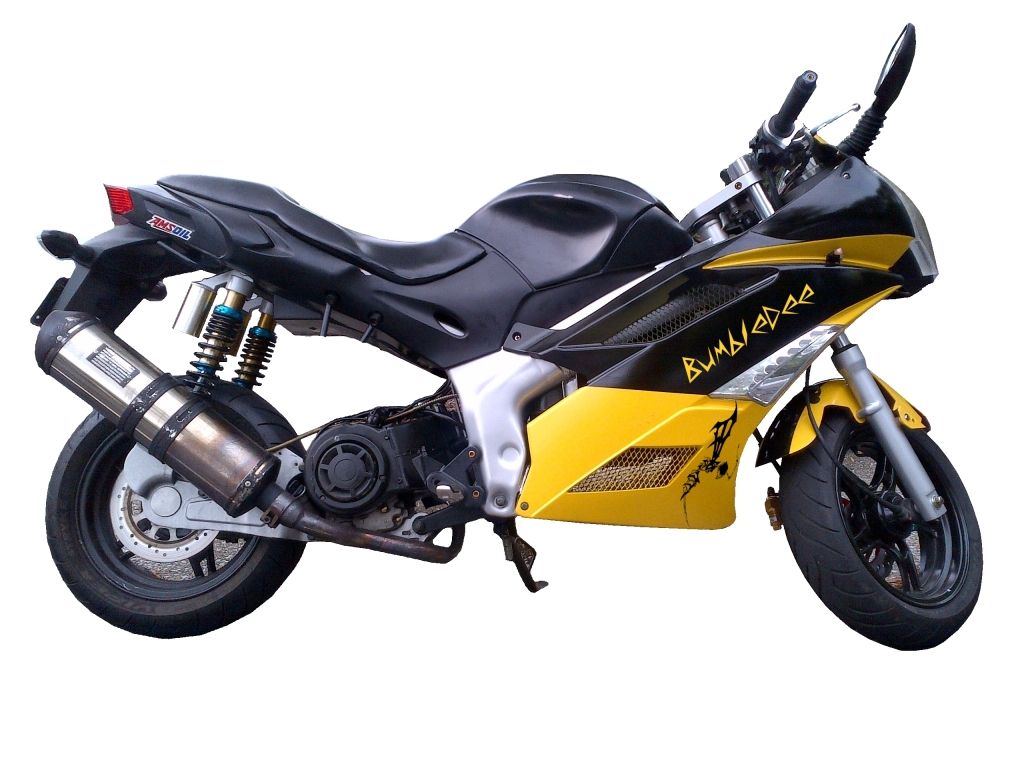 |
|
|
|
Post by fieroboom on Sept 11, 2012 19:21:43 GMT -5
Sorry for so many posts right away, just trying to get all this down.... Anyway, on to current events! This past weekend I took off all the plastics and went to work on moving electricals and dropping the fuel tank 4". Doing this will allow me enough room to run my intake tube from the intake manifold on the head all the way up front in the direct air stream. Stock tank location: 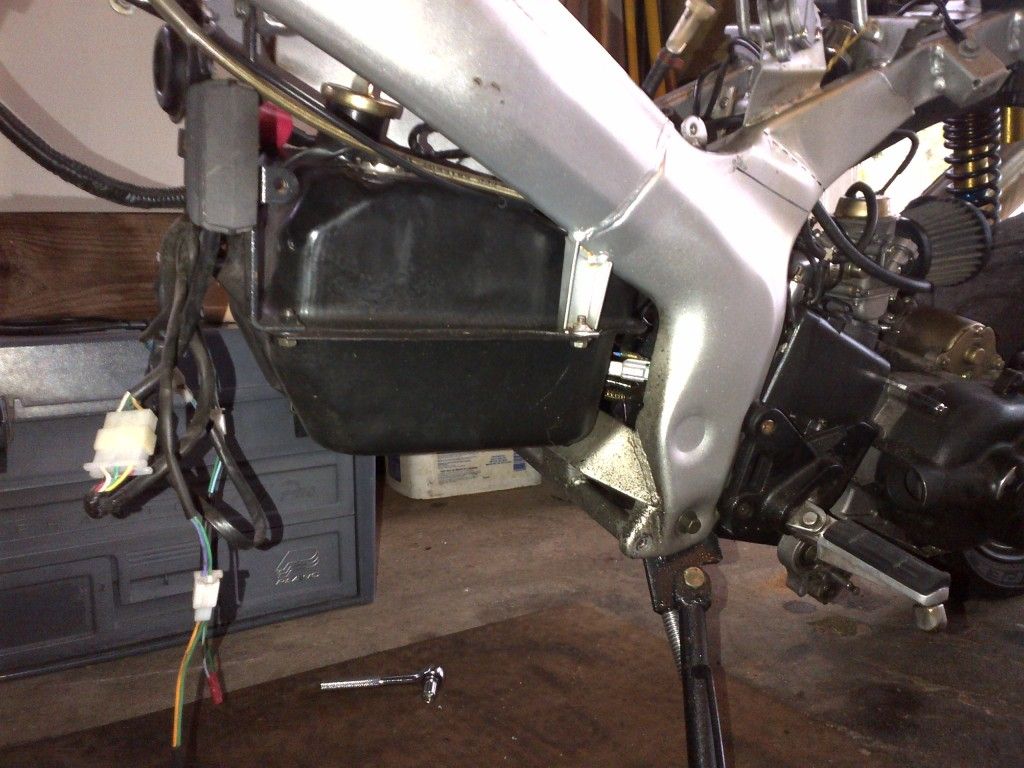 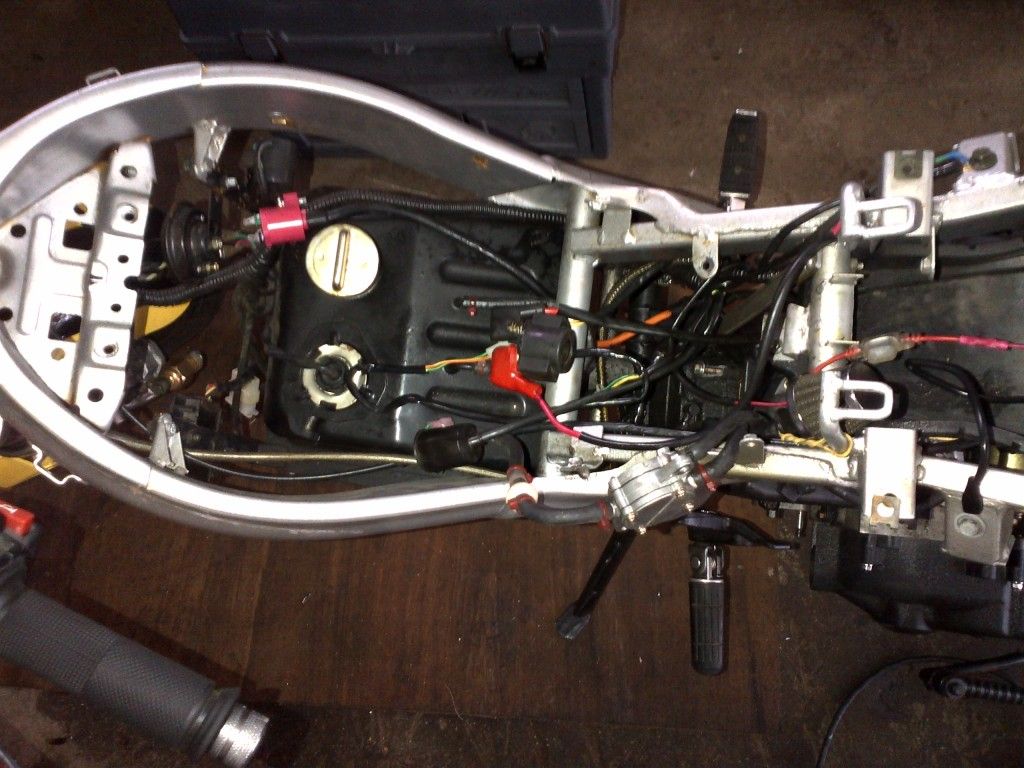 It was late Sunday night when I finished, and I was in a hurry to get it back together for my Monday commute to work, so I don't have any pics yet after dropping it. All of my metal should be here tomorrow though, so I'll have plenty of pics this weekend when I tear it down again.  Here is the rear section I'd like to modify, just not exactly sure how I want it to look yet: 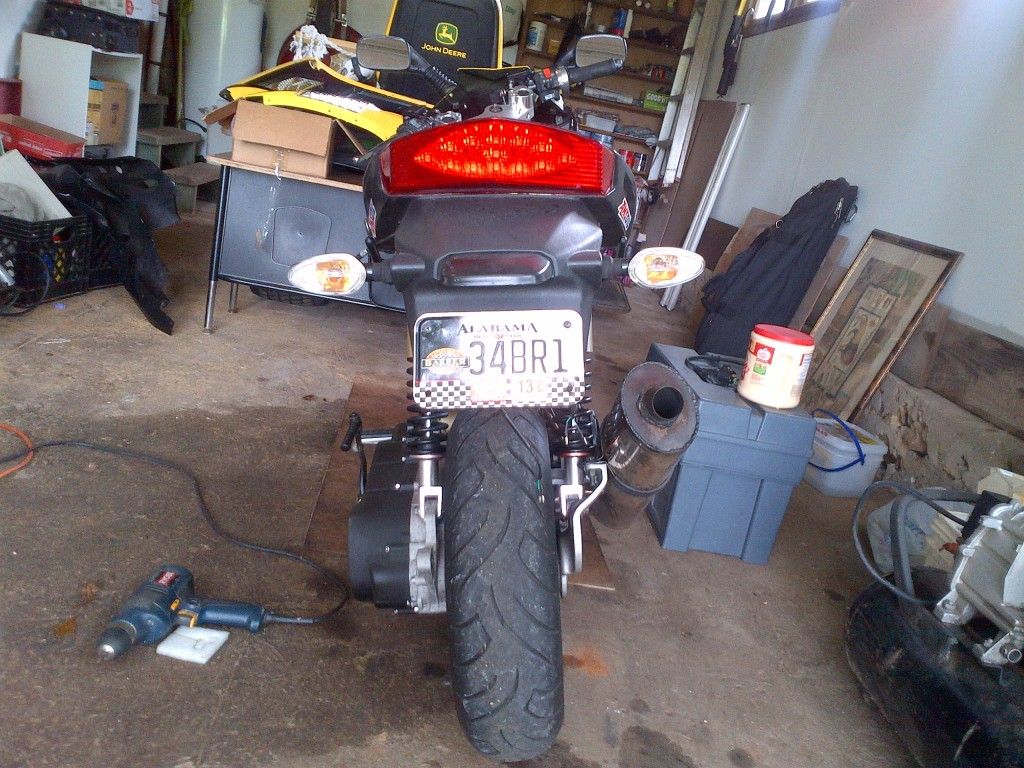 And underneath the assemly: 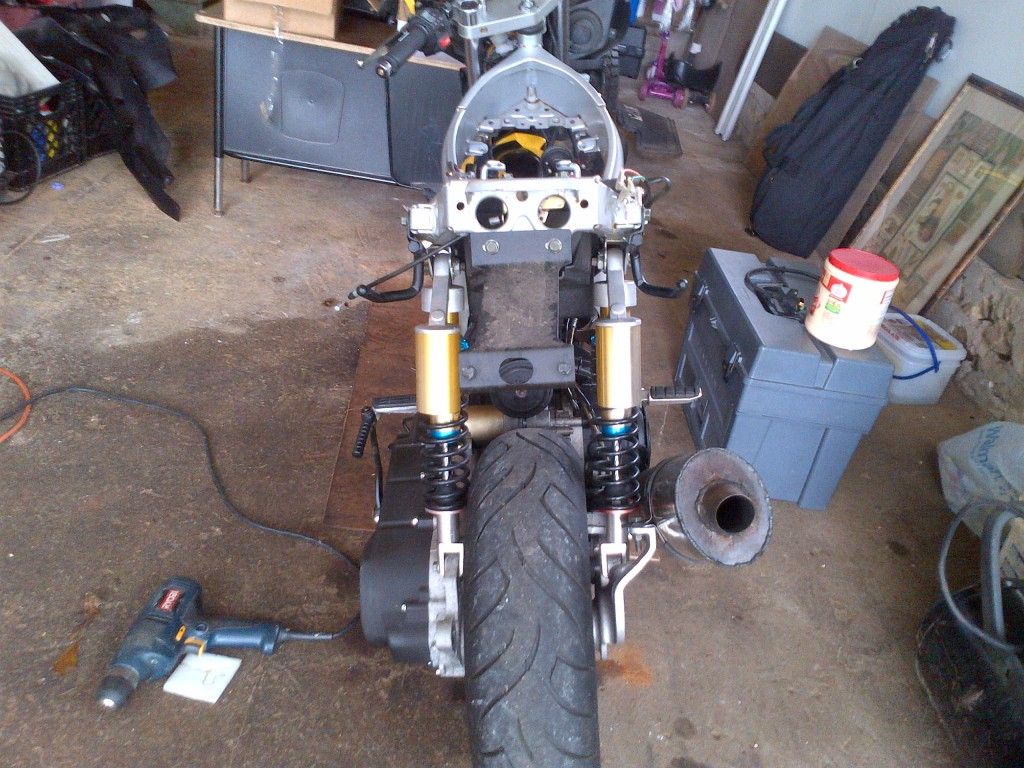 This is how I check my GPS speed:  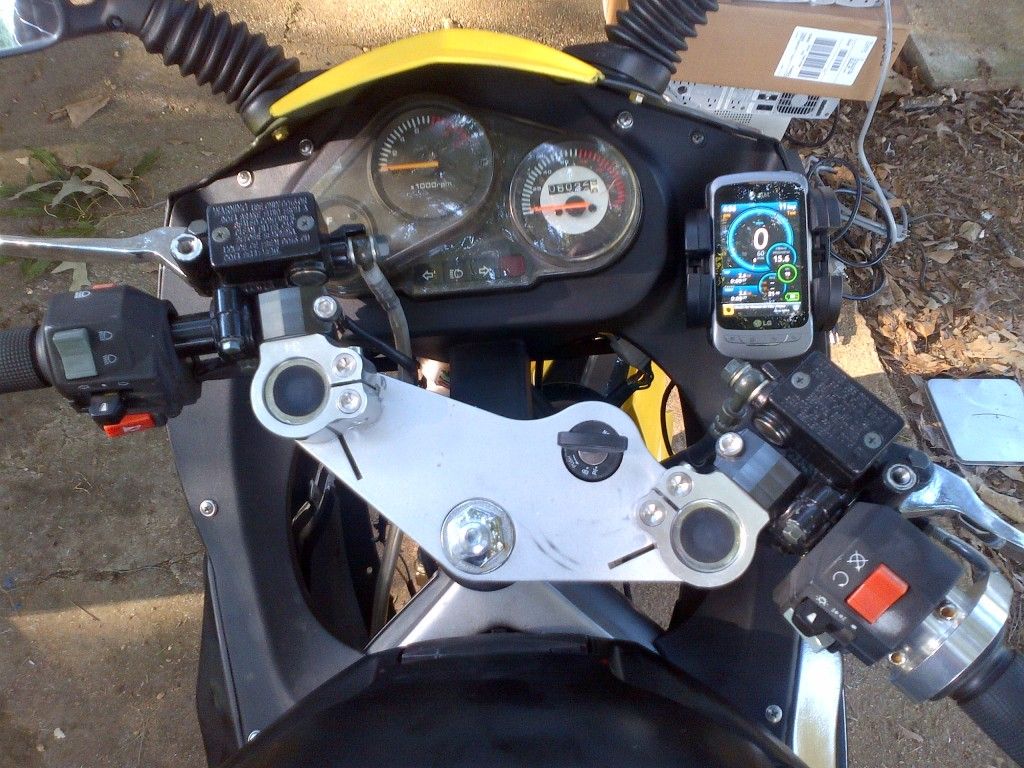 |
|
|
|
Post by fieroboom on Sept 28, 2012 21:50:57 GMT -5
Hey guys & girls, it's been a lil while... I changed my albums around on photobucket, which broke my pics here, but I've fixed em now. Anyway, on the the build!! Due to the location of the K&N air filter being right smack dab in front of the rear tire, I wanted to move it. I also know a little about tuned intakes, so I thought it might be beneficial to make an intake runner (a length of tube/pipe between the intake and the carb) that would #1 - move the carb & filter up front, away from the dirt of the rear wheel, and #2 - cool the intake charge, thereby creating a little more power... According to my calculations, the ideal tuned intake for this engine with it's max torque @ 7500 RPM would be about .78" cross section area (comes out to .99" diameter) at 11.20" long. a full 1.25" diameter at ~12" long would give me power low end power, but losing a little top end. This is fine, since it should allow me to change out variator weights or possibly upgear for a lower RPM @ top speed. I have the NCY 30mm aluminum intake. 30mm = 1.18", and the outer diameter is around 1.25." The rubber connector that joined the intake to the carb was somewhat dry rotted & cracked, along with being melted by the fuel on the outside. At first, the only thing I could find was a 1.25" diameter rubber heater hose, so I bought 2 ft of it and connected it up: 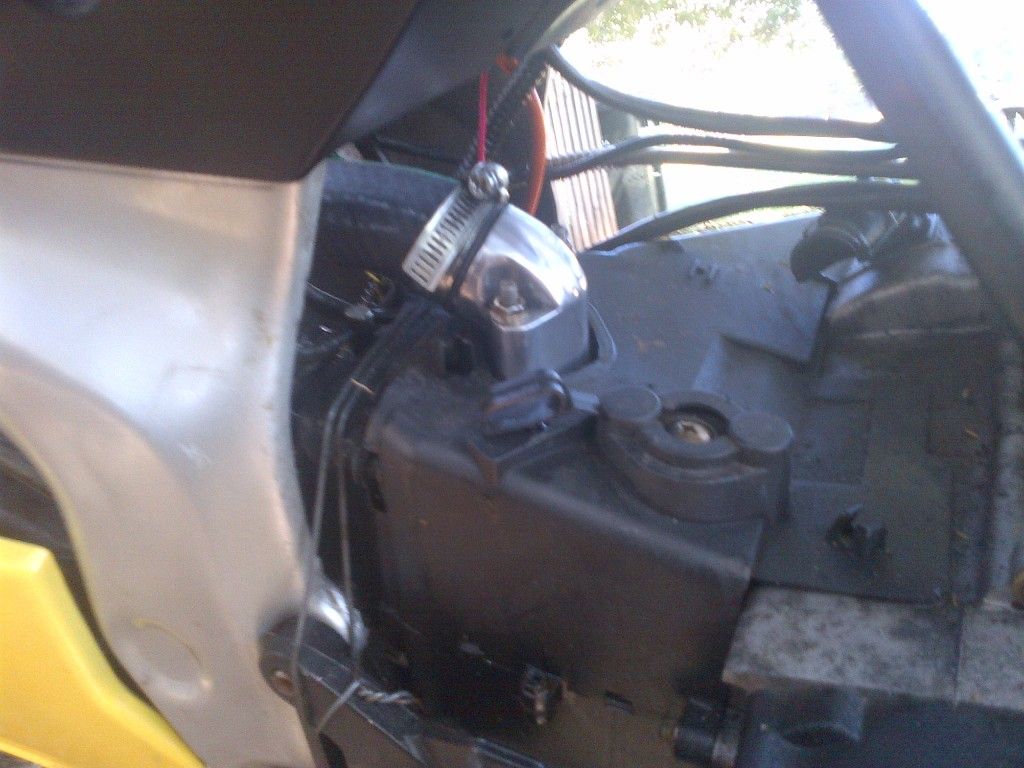 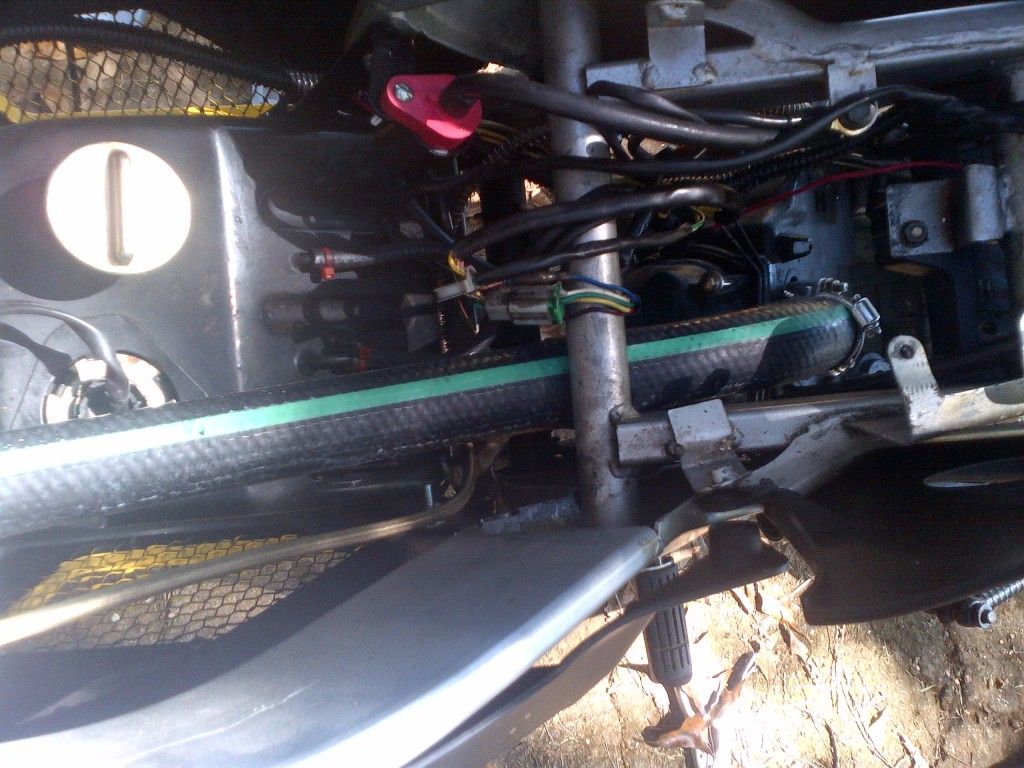 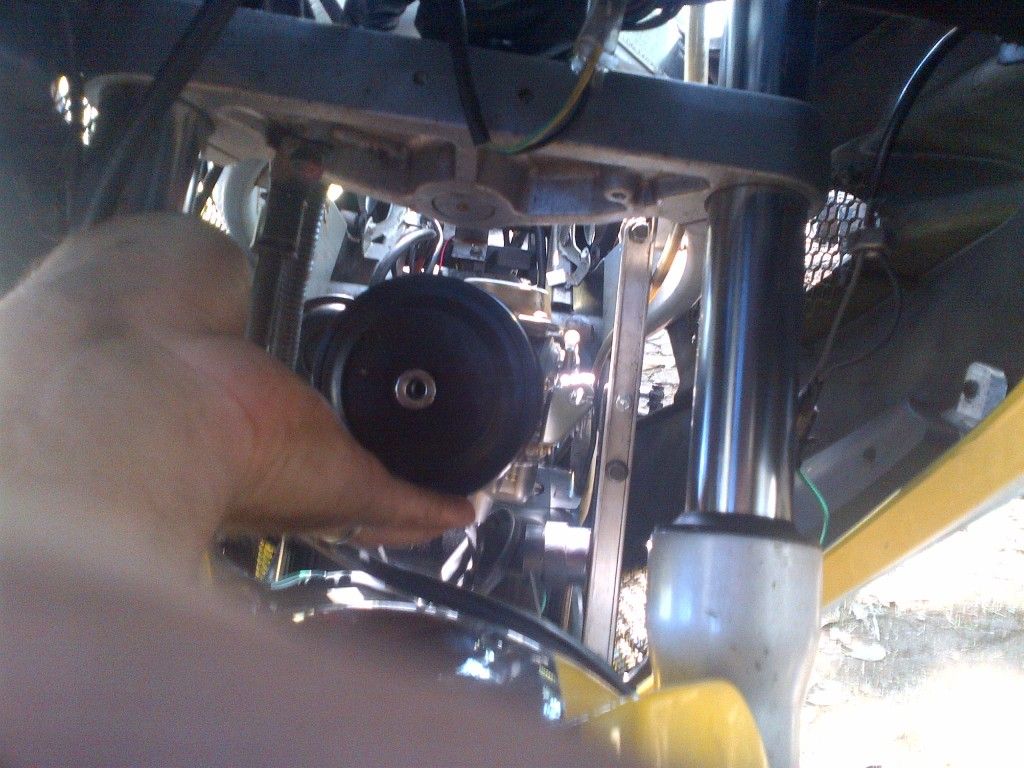 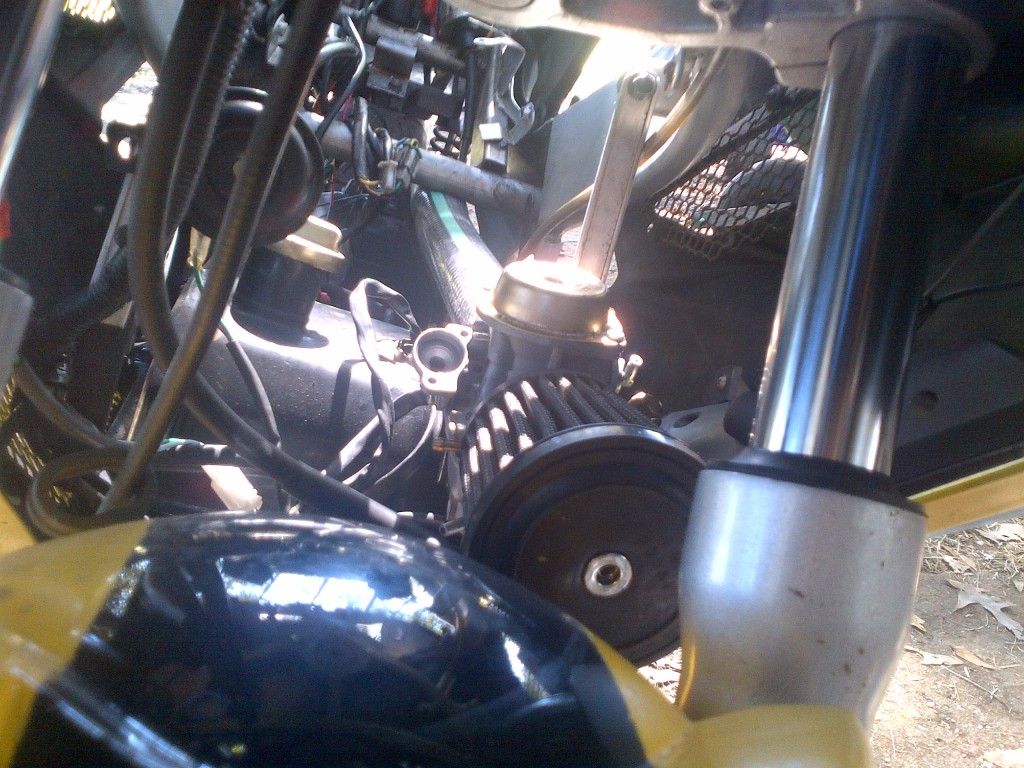 I was racking my brain trying to figure out where I could find a 1.25" O.D. thin walled pipe that I could use instead of the rubber hose... For 2 days I thought and thought, and came up with nothing. Then, I was in Lowe's buying a new bathtub drain stop, and it hit me... 1.25" chrome sink drain pipe. It was $7 for a 12" long piece with both ends threaded (ie, no flared end for another piece to slide in). So I bought it, slid it in a piece of my new rubber hose, and it fit PERFECT!!  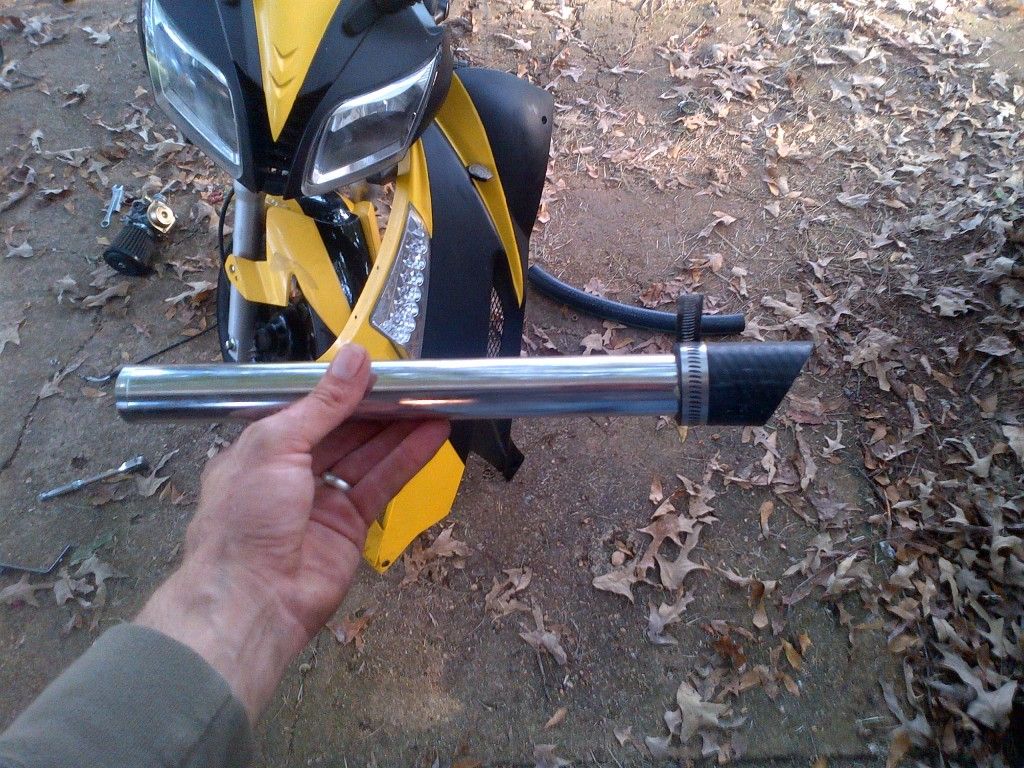 So I laid it in and guesstimated the carb placement, then got to work on a mount bracket for the carb... Due to vibration, I didn't want to mount it to any critical area, just in case the vibration would break where I screwed it in, so I decided to mount to the throttle cable bracket screws. It looked like a beefy spot, and I was comfortable with it. 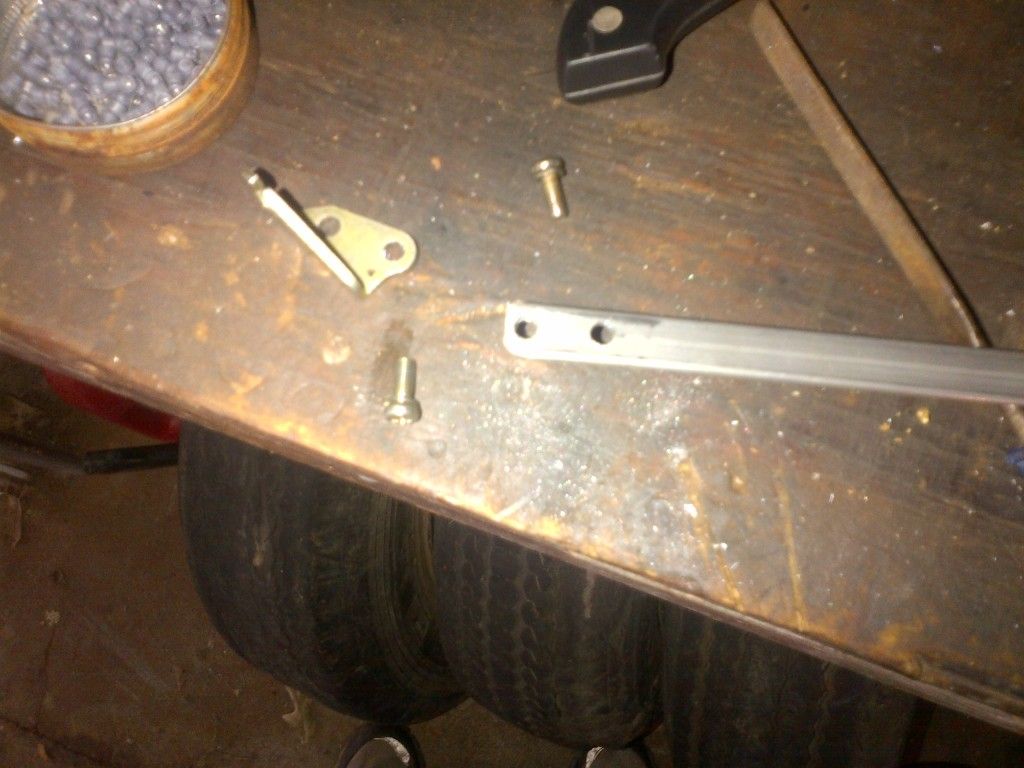 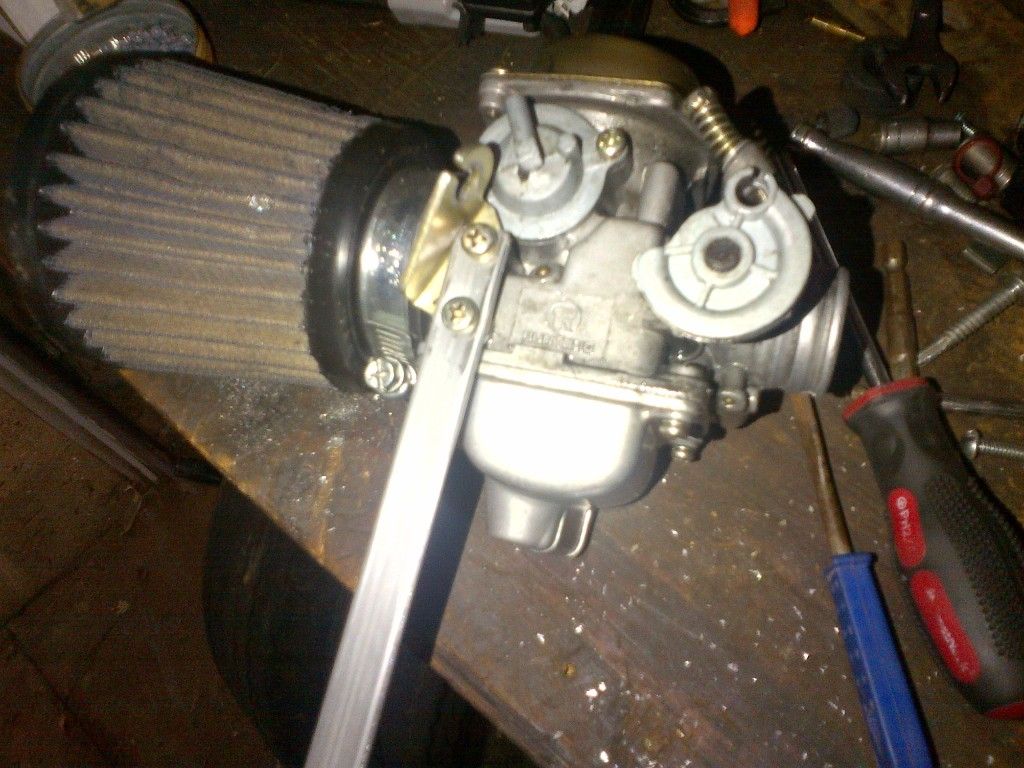 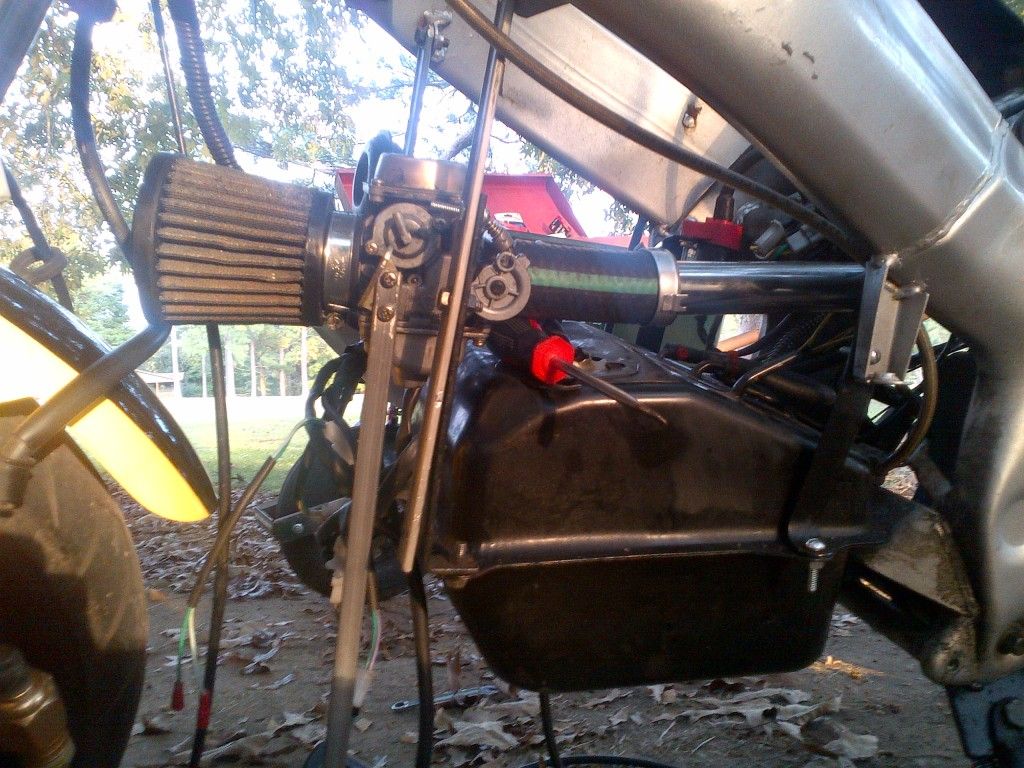 Then I bent my mount to bolt onto the fuel tank mount on the front left corner: 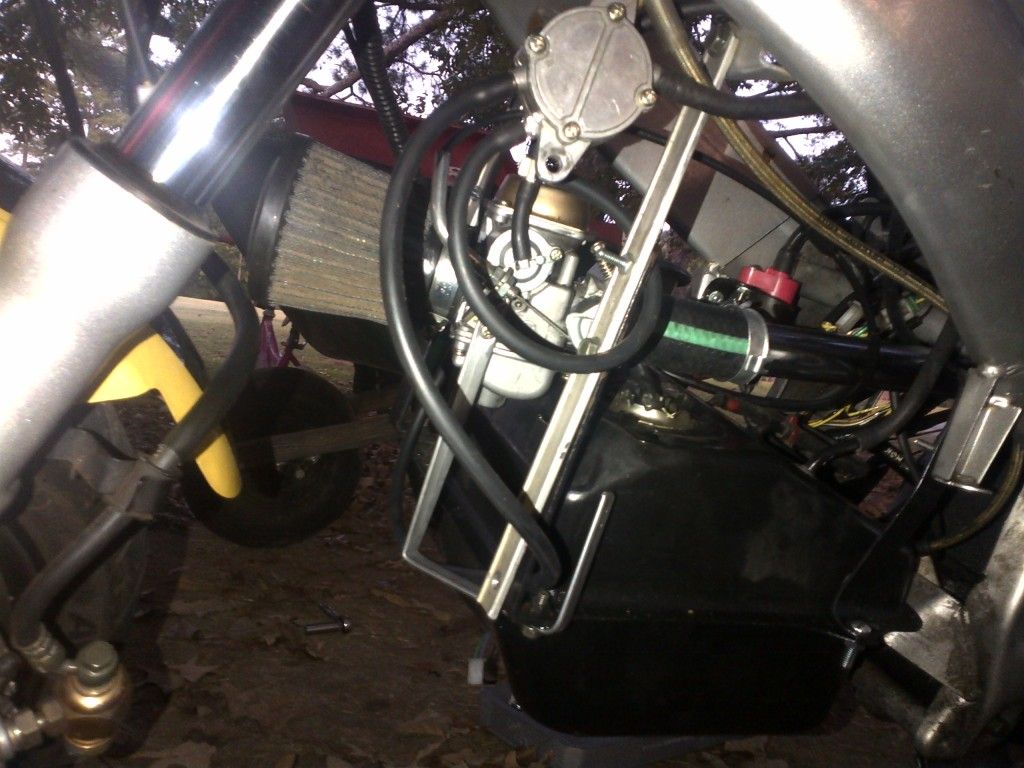 And now it looks great! 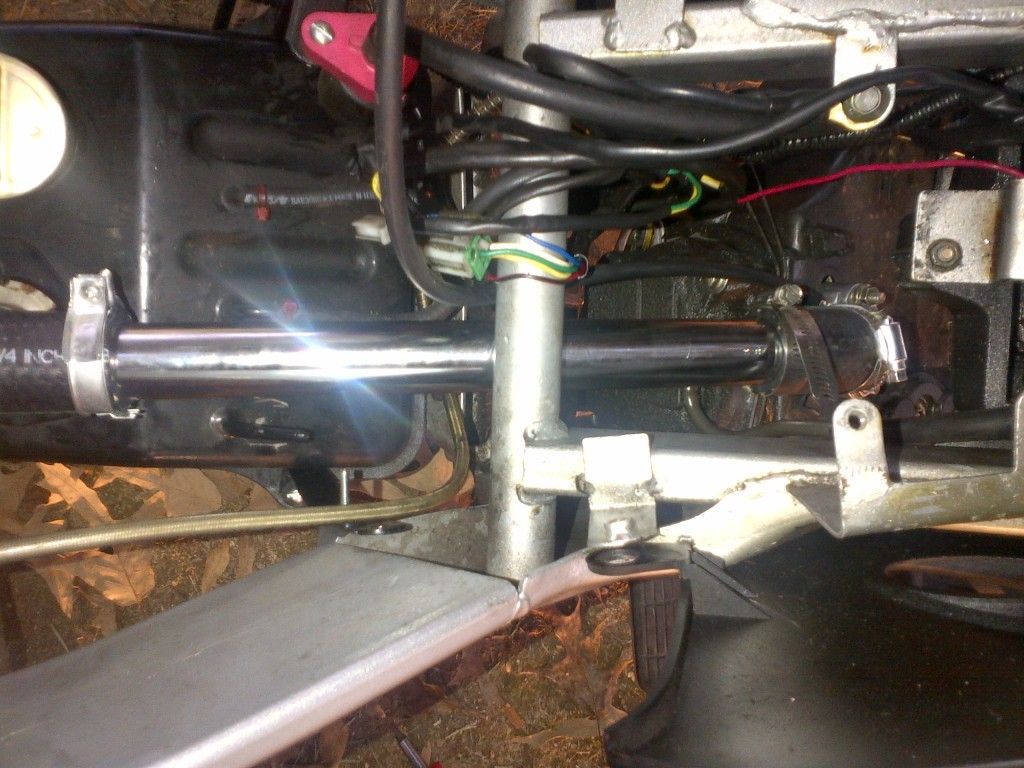 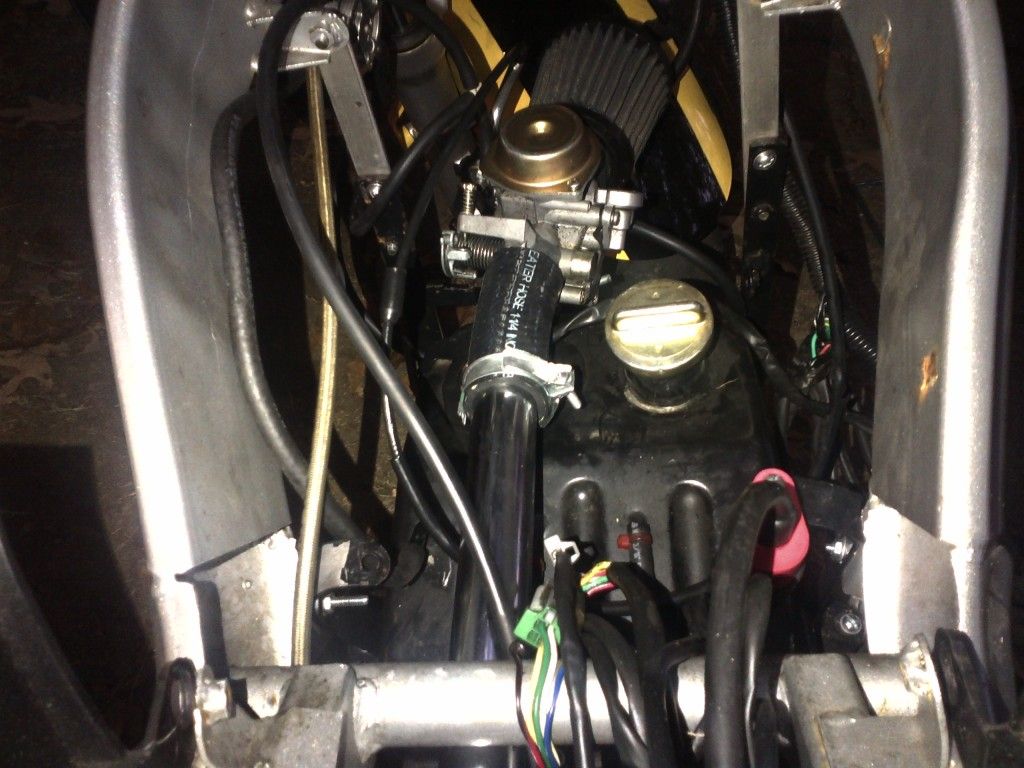 |
|
|
|
Post by fieroboom on Sept 28, 2012 22:10:45 GMT -5
After I finished the intake installation (and rewired almost the entire harness), I fired it up. I ran REALLY rough, skipped, and died several times. I thought maybe I got some fuel above the diaphragm, so I let it sit a day, then tried again. The next day, after firing about 3 times, the spark plug boot fell off... Great, yet another annoyance. This was supposedly a fairly high quality NGK boot with a fairly new coil & wire, but the vibration killed it. The threads on the spark plug stud were stripped, and the small clip inside the boot was worn beyond repair, so there was no grip or friction holding it on. Since I had to fix this anyway, I decided to figure out a way to upgrade it... So why not a coil-on-plug? I checked them out, and they were $62 & change from NCY. Maybe one day, but it's not in the budget for now, so I head to O'Reilly's, started brainstorming, and came up with a DIY coil-on-plug.  Here is the original setup, disassembled: 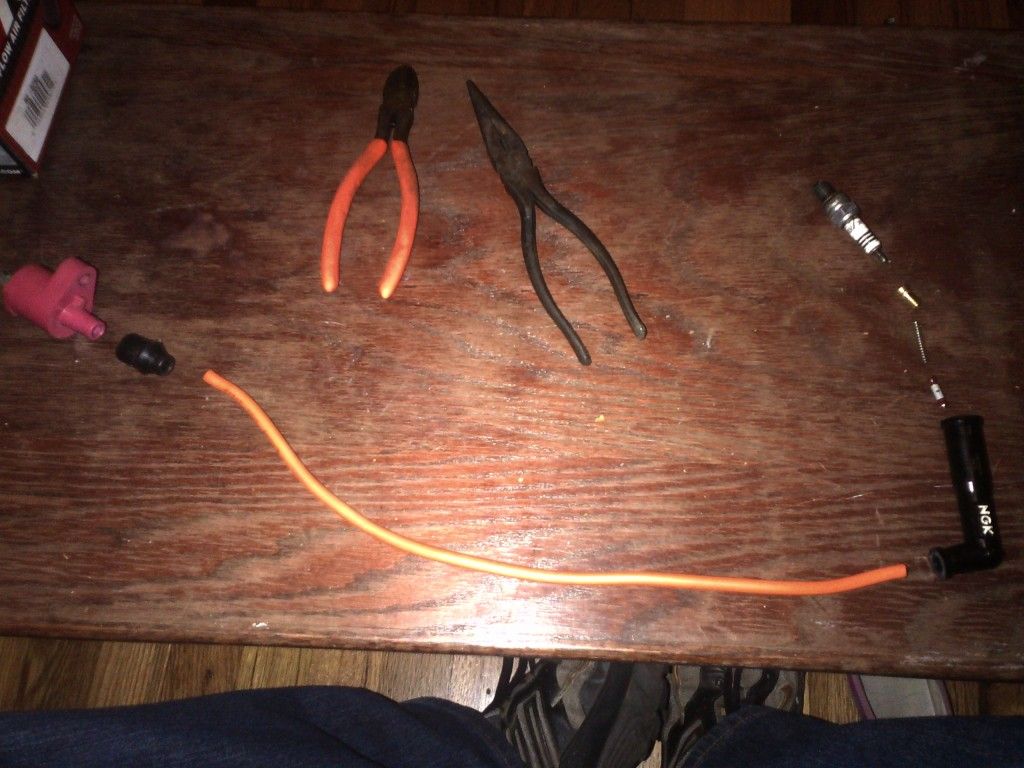 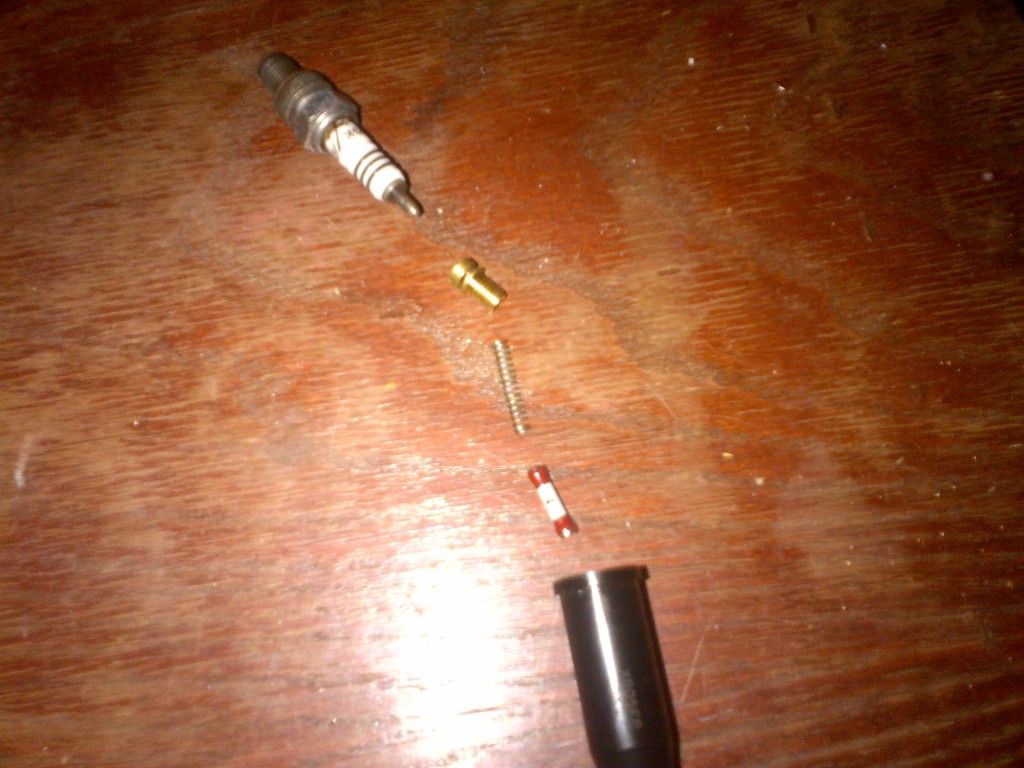 At O'Reilly's, I found the perfect rubber hose, and a pack of springs, but I ended up re-using the existing pieces: 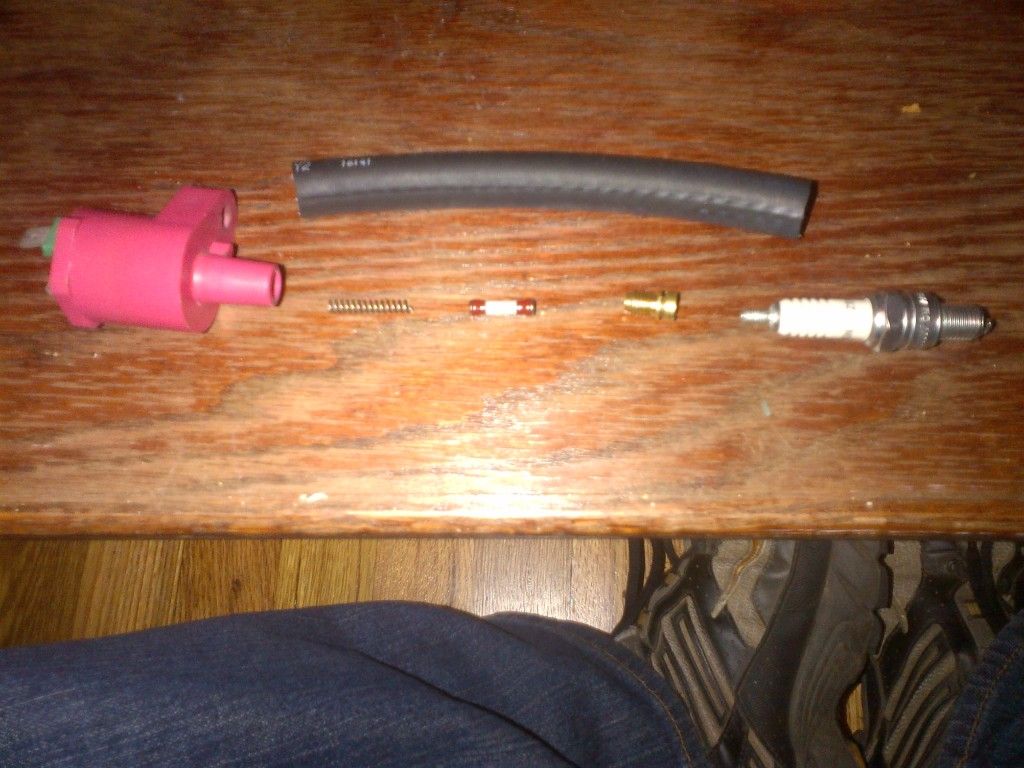 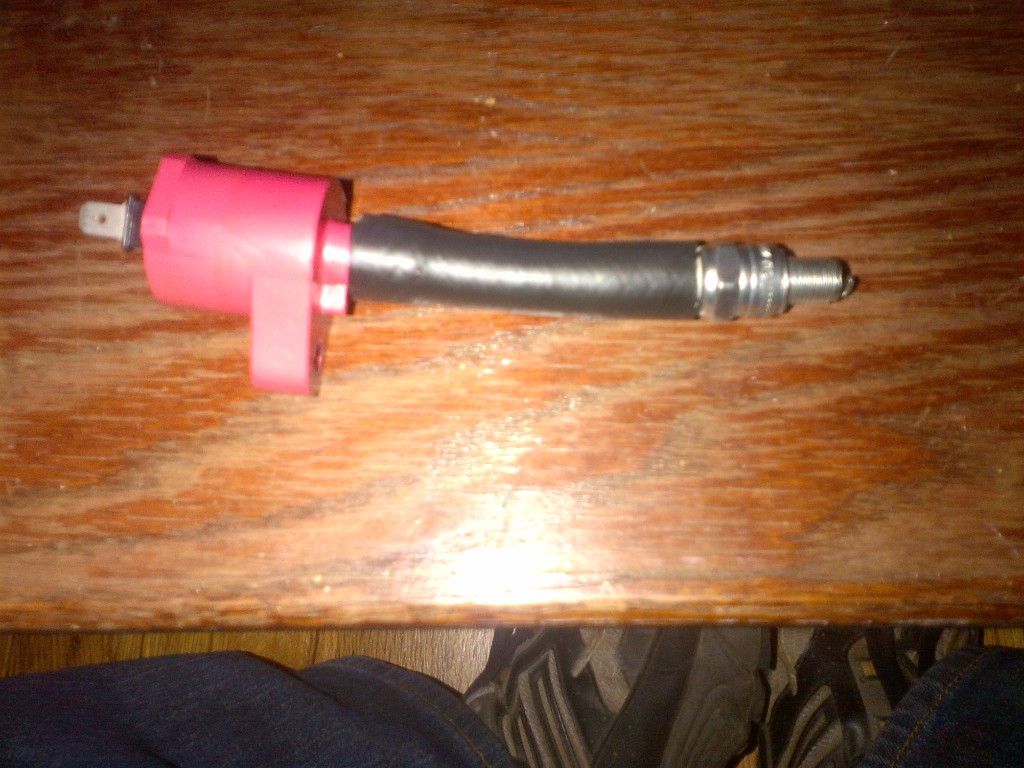 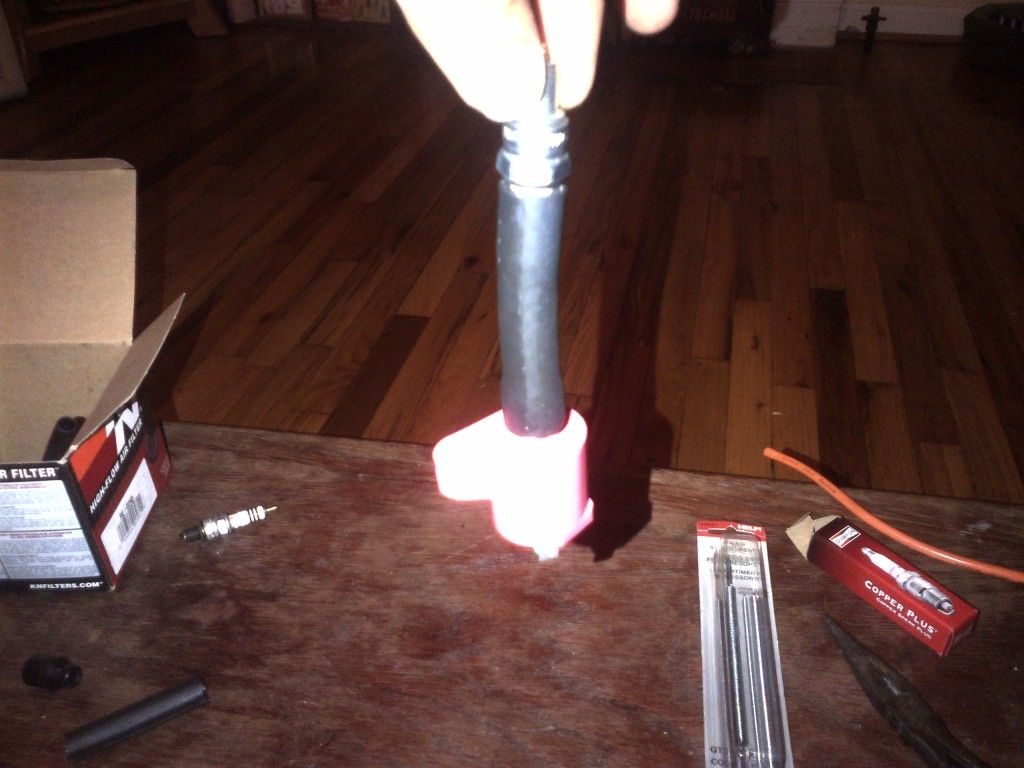 No pics of it on the bike yet, because well, I hopped on it & took off... Plus, it was dark, and I had to post everything when I got back.  The verdict is just as I suspected: Takes off a LOT stronger & pulls great up through about 6,000-6,500 RPM, but I did lose a little top end. It used to cruise at about 60 (GPS speed) on flat ground, and now I'm at about 55-56, based on a few short runs. Also, it feels like it might still be a little rich, but I've got a pack of jets on the way, so hopefully I can get it dialed in just right. Due to several bad experiences with NGK spark plugs (the insulators like to crack & leak spark out), I trashed the NGK iridium, and went with the tried & true Champion plug. It's a Champion 808, if anyone needs to know... Questions, Comments? Let me know what you think!!  |
|
|
|
Post by Lukain on Sept 29, 2012 18:12:11 GMT -5
Freaking loving it. Keep it coming. Your doing some things I have been pondering. Looking forward to the swing arm strech. I have liked what I have seen of some heavy modded Yamaha Maj's. regarding swing-arms and body panel mods. Been trying to keep up with some hows for my ride. Your thread has already giving me an intresting solution to something I have been pondering on.about the carb and intake set-up.
|
|
|
|
Post by fieroboom on Oct 1, 2012 8:03:10 GMT -5
Freaking loving it. Keep it coming. Your doing some things I have been pondering. Looking forward to the swing arm strech. I have liked what I have seen of some heavy modded Yamaha Maj's. regarding swing-arms and body panel mods. Been trying to keep up with some hows for my ride. Your thread has already giving me an intresting solution to something I have been pondering on.about the carb and intake set-up. Hey thanks Lukain. I did the intake runner before on a bicycle mounted engine I had (the same chinese kits you see all over eBay), and it did awesome. The only issue with this bike is I don't have the right angle to make it short enough, due to the crossmember support back near the intake. The whole intake runner, rubber boots & all really needs to be about 3-4" shorter ideally. The chrome tube is 12" by itself, and there's about 1/2-1" of that used up by the boots coming over the ends, and then I've got about 4-5" of rubber boots all together. I'm guessing the entire tract is around 14-15", and needs to be around 10-11" for that diameter. I've already done a photo mock-up to get an idea of what has to be done in order to stretch it the way I want. The image looks like it's missing a lot, because I just cut it up & pulled it apart, but the overall idea is what I'm going for: 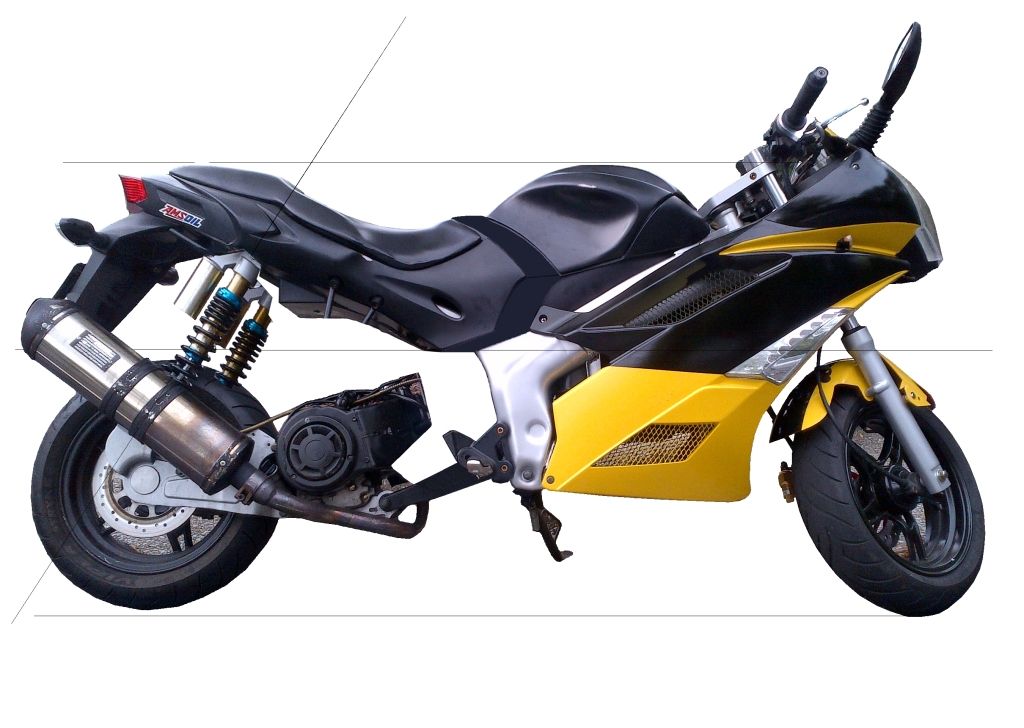 Here's the original length for 1:1 comparison: 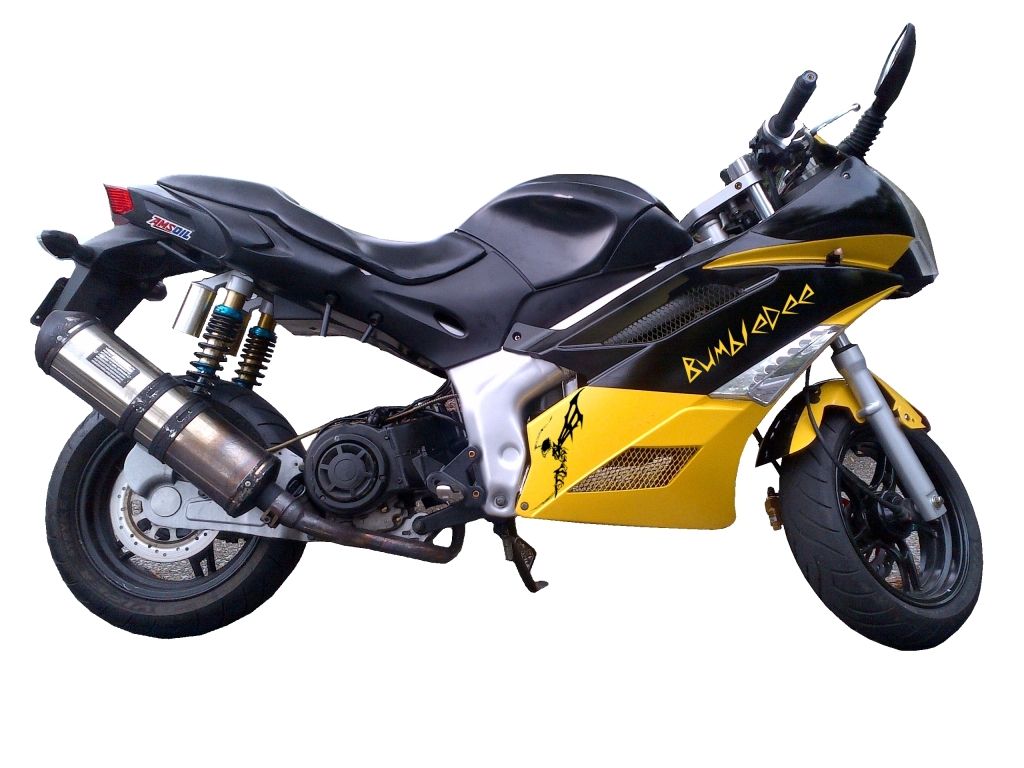 I want the seat portion pulled back about 3", and as for the swingarm, I want the rear tire 6" further back than where it sits. I'll probably accomplish this at first by just extending the swingarm 6", but eventually I'd like to stretch the CVT case 3" and the swingarm 3" so I can run 16" wheels on it for a little more stability & feel of a sport bike, rather than more of the little-wheel-scooter-feel, if that makes any sense. I'm also planning on being able to move the seat to the 3" stretched position, or put it back to stock position without too much effort. I'm imagining something like making some sliders out of angle & 1.5" square tube so I can slide the seat, drop in some bolts & tighten, and be done. The reason for this is b/c my wife will eventually get this one, and she's a little shorter than I am.  I plan to fiberglass that grey section where it's stretched as a small stand-alone storage compartment that can be removed. |
|
|
|
Post by fieroboom on Oct 1, 2012 8:59:19 GMT -5
In case anyone is skeptical of tuned intakes, or wants to just learn more, here is an EXCELLENT explanation of the theory and process of how air travels through your intake tract: www.team-integra.net/forum/blogs/michaeldelaney/130-intake-manifold-tech-runner-size-calculations.htmlIt's quite a long read, so grab some popcorn, but it starts at a very good level that anyone can understand. Here are a couple of the calculators I used to double check my math: www.wallaceracing.com/runnertorquecalc.phpwww.rbracing-rsr.com/runnertorquecalc.htmlThey look cheesy, and are probably the same code (they're very similar) but the numbers are spot-on with what I had already calculated. Remember, when doing any engine calculations, don't rely on just your math, or any single calculator that you may find on a search. I always double check my math with at least 2 more external sources. Here is a calculator that will tell you at what RPMs (and strength) your harmonics will resonate inside your intake runner of a given length: www.bgsoflex.com/intakeln.htmlOne reason I'm so familiar with this tuned intake theory & operation is because I am very steeped in music & music theory (my mother has been a voice teacher all my life), and since your intake flow travels like a sound wave, it just makes sense to me.  The most simplistic way to explain intake tuning and visually see it is take a large bowl, fill it with water, and drop a pebble in the center, then watch the resulting waves. You will see initial, strong waves resonating from the pebble entry point (imagine those going into your intake), then when they hit the bowl wall, they will reflect back to the center (bounce off the now closed intake valve & back out the manifold). The purpose of a tuned intake is to get the second reflection (back out from the center of the bowl) to hit the intake valve while it's open....  Let me know if any of you want any more information on the subject; I'd love to see a bunch of tuned intakes popping up with their performance results!!  |
|
|
|
Post by inuyasha on Oct 1, 2012 12:37:50 GMT -5
Hi
Outstanding
Pleased to meet you
Shes one sharp looking scoot and your build thread is very impressive, thanks for sharing
May she bring you much joy in the years to come
Take care and ride safley
Yours Hank
|
|
|
|
Post by geh3333 on Oct 1, 2012 13:41:49 GMT -5
do you have an electric fuel pump ?
|
|
|
|
Post by fieroboom on Oct 1, 2012 14:18:04 GMT -5
do you have an electric fuel pump ? No, not yet. I recently moved, so everything I do right now is in "low budget mode" heh  The standard 4-5psi electric fuel pumps are around $40-50, and I just haven't been able to pull it off yet, but it's definitely on my to-do list... |
|
|
|
Post by fieroboom on Oct 1, 2012 14:36:49 GMT -5
Hi Outstanding Pleased to meet you Shes one sharp looking scoot and your build thread is very impressive, thanks for sharing May she bring you much joy in the years to come Take care and ride safley Yours Hank Thanks!  |
|
|
|
Post by geh3333 on Oct 2, 2012 8:40:17 GMT -5
looks like your carb is above the tank , if so , your gonna eventually have problems with fuel flow to the carb. you definitely need a fuel pump . BTW nice scootercycle !
|
|
|
|
Post by urbanmadness on Dec 5, 2012 14:49:39 GMT -5
I so want to test ride one of those, to see if I like it!
|
|
|
|
Post by dyoung1167 on Dec 5, 2012 20:14:43 GMT -5
i'm usually more of a lurker on these type of threads but i had to chime in give ya the thumbs up. so many just throw parts at it and see what happens. it's very refreshing to see someone due the math (literally). first and only thread i'm bookmarking
|
|