How to Build a Trike Kit For Your Scooter
May 18, 2009 13:55:37 GMT -5
wolfbat3 and geometro like this
Post by tomtom on May 18, 2009 13:55:37 GMT -5
Part 1: What You Will Need
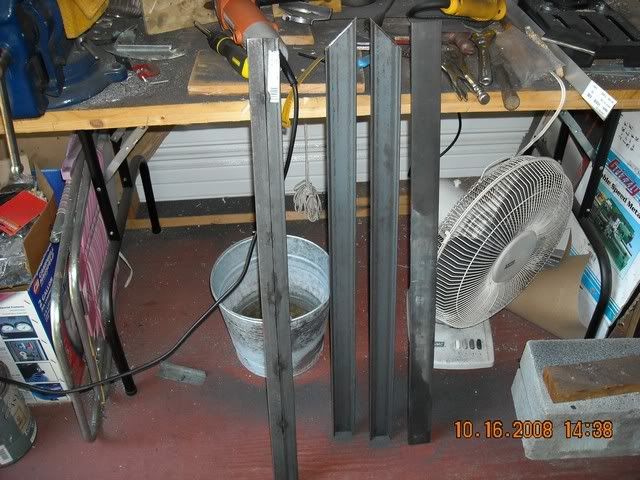
Four pieces of steel channel ½ inch by 2” by 36”. The one on the left is actually two pieces of 1” angle iron welded together because I could only find 3 pieces of 2” channel in town. All of them were bought from Tractor Supply Co. (about $15 each).
Optional – several pieces of ½ inch by 2 inch by 3 feet steel channel. These will be used to bolster the strength of the four 2” pieces in certain places such as the axle mounting plates. Of course, this is up to you. (You grind down the legs a little and weld them on the other side of the 2” pieces).
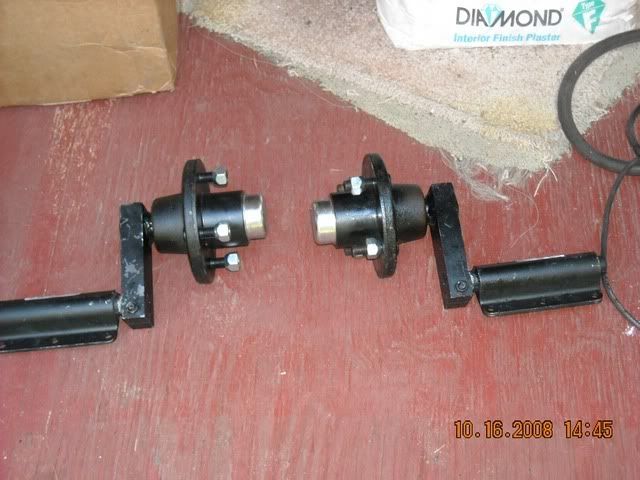
Two half torsion axles (adjustable), 425 lbs capacity. I bought the lightest capacity they had because I didn’t want the suspension to end up being to stiff. I bought them online from Southwest Wheel in Dallas. (Dang, I should have had Earl run by there to pick them up). The two of them cost $225. You might be able to get them locally from a trailer dealer a little cheaper. I think Northern Tool also sells them.
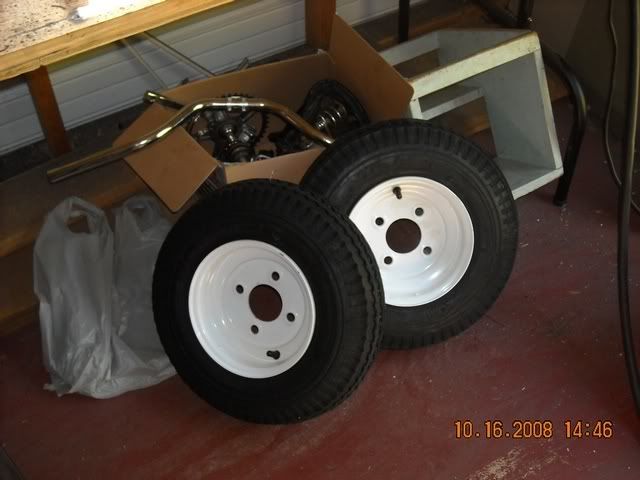
Two 4” by 8” wheels and tires from Southwest Wheel. About $25 each. Also sold by Harbor Freight and other, including Tractor Supply. Just make sure that the wheels are matched to your axles (in my case, four bolt on a 4” mounting circle).
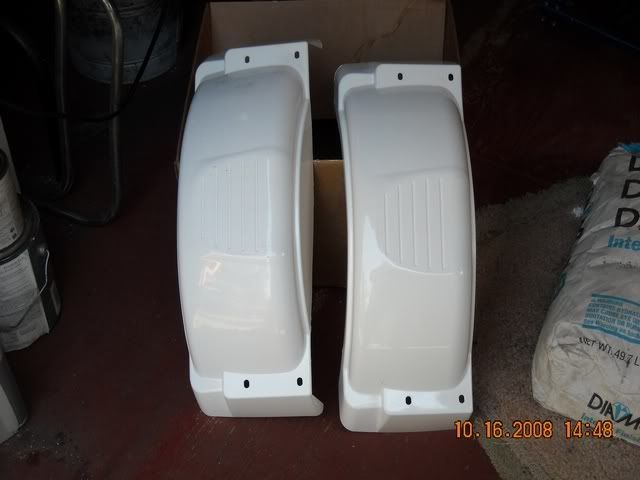
Two Fenders from Tractor Supply, about $15 each. These were rather thin plastic. I didn’t want the bigger or heavier metal ones. Sure wish they had them in fiberglass. Hope they can be painted, cause they have a slick finish and I don’t like white.
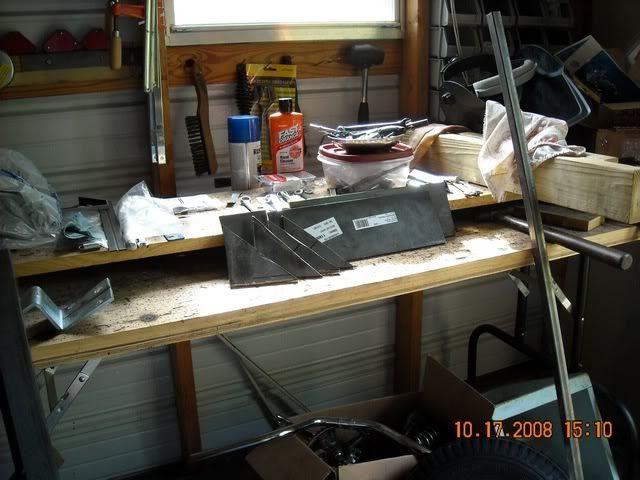
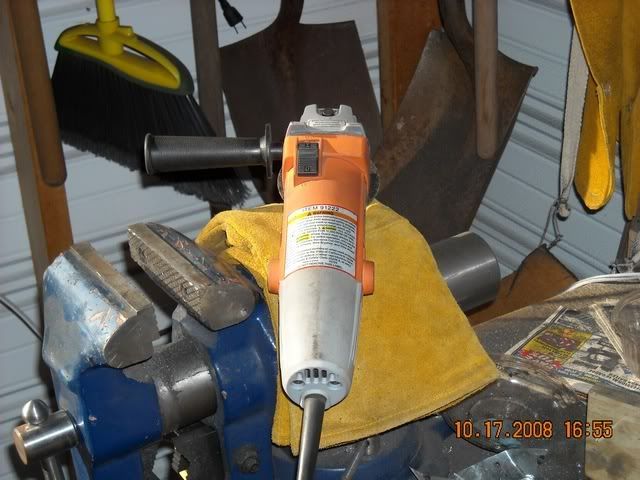
Three pieces of ¼ inch by 4” by 12” steel plate. One piece will be used to make four corner gussets and 1 will be used as mounting plates for the axles. You probably won’t need the other piece, but it’s always good to have a spare. About $18 each at Lowes. I thought that my 14” cut-off saw would zip through that ¼ inch steel plate, but no go. I ended up using one of my favorite toys, the angle grinder.
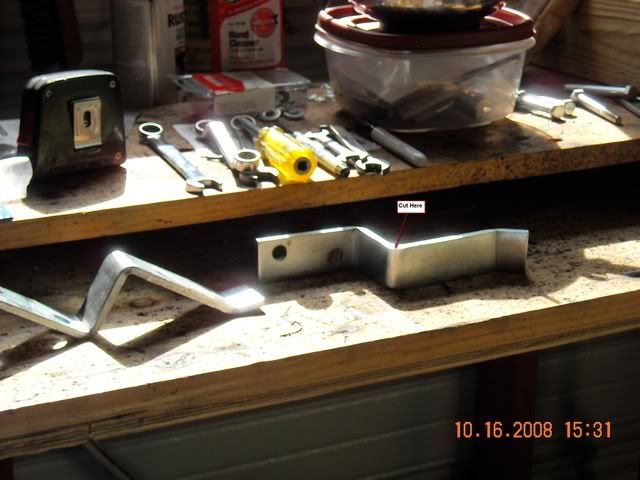
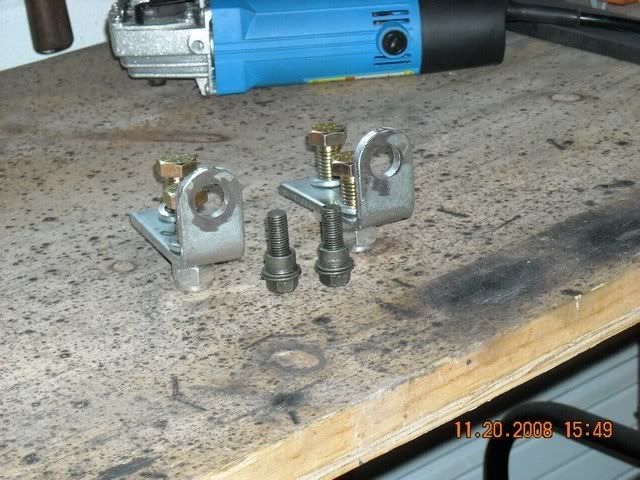
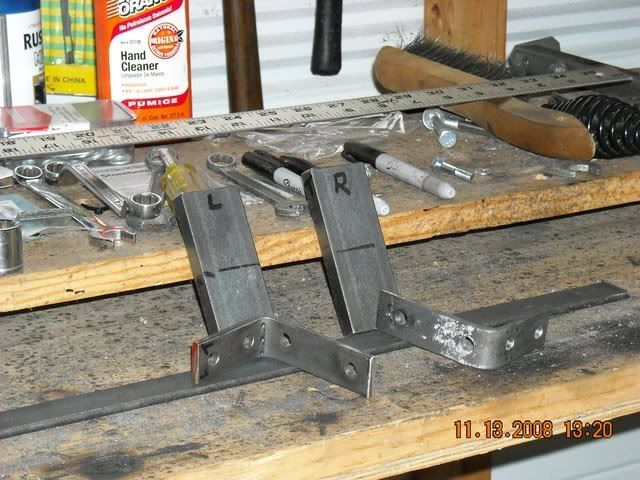
Two brackets from Lowes, about $3or $4 each. These will be cut in two pieces, as shown. The part with the two holes will be used as a mounting bracket at the front of the trike frame to the center stand.
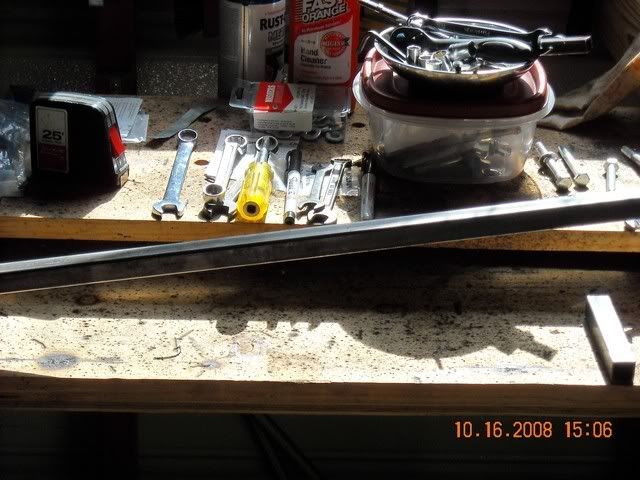
A four foot piece of ¾ inch square tubing to connect the rear of the trike frame to the upper part of the scooter frame. About $3 or $4 each.
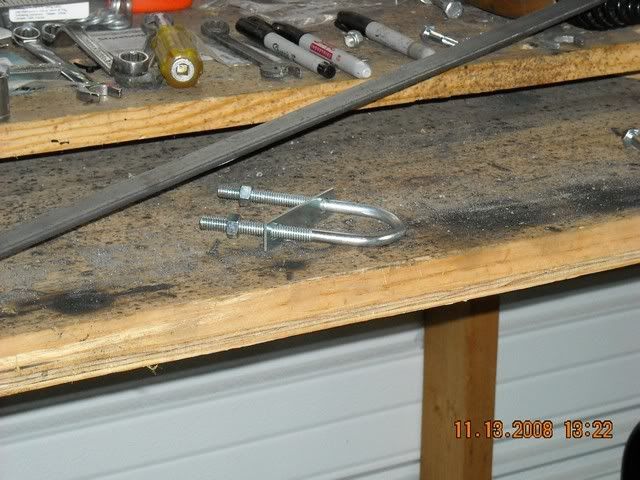
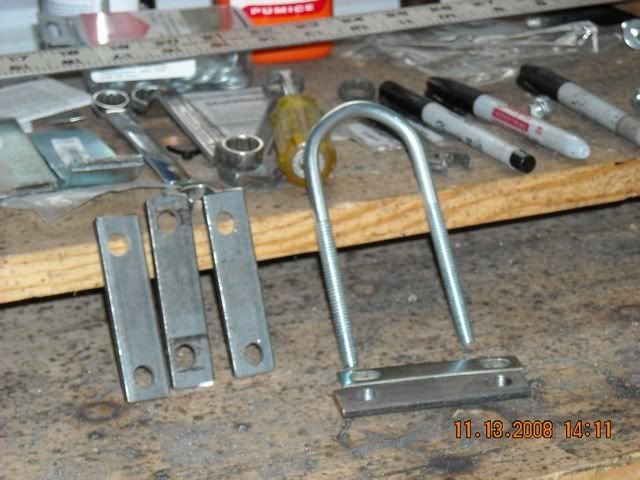
Approximately 4 feet of flat steel 3/16” X 1”. This will be used to fabricate the upper mounting bracket to the frame in the rear and to make the lower mounting bracket that attaches to the down tube. You will also need four 5/16” U-Bolts. Replace the thin U-Bolt brackets with stronger ones fabricated from 3/16” X ½” or ¾” wide flat steel.
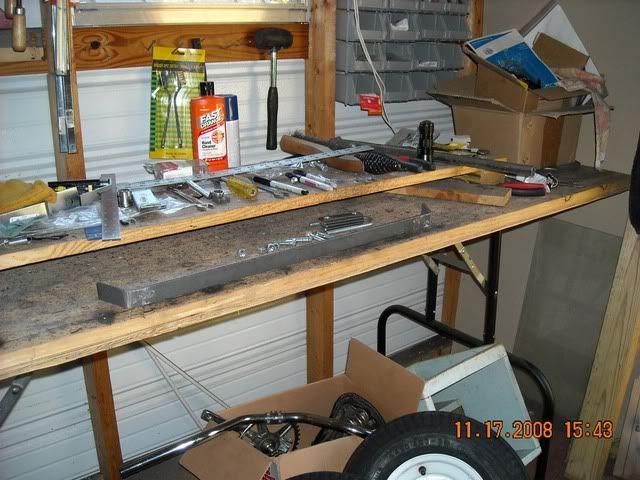
One piece of flat steel approximately 1.25 inches wide and 3/16” thick. Bend the ends to the correct angle (to be determined later) to mount the rear support brackets to the frame. The parts will be approximately 2” on one side and 3 or 4” on the other. As shown later, the long leg will have slots milled in them to provide some adjustment up or down for the frame at the rear.
You will also need various hardware such as bolts, nuts, washers, paint,etc.
This ends Part 1. The next part is Fabrication of the Parts.
Part 2: Fabricating the Parts.
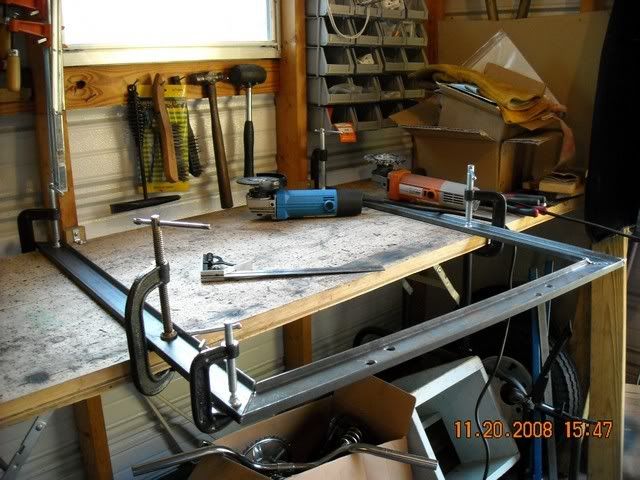
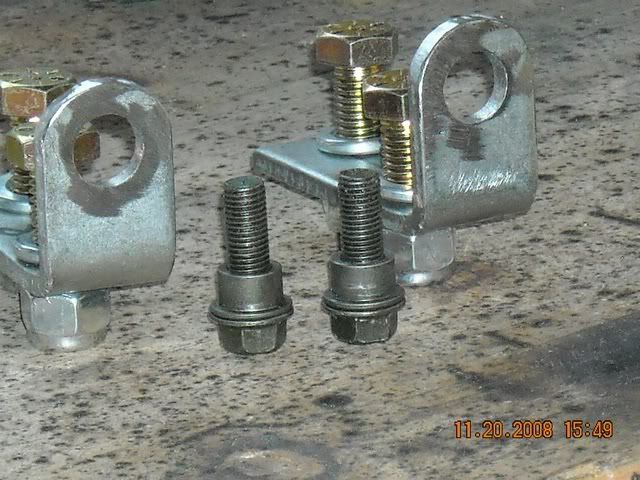
Cut each part of the frame (steel channel) so that you have 45 degree corners. Grind a relief into the corner edges so that they can be welded. Cut the two brackets so that you have two pieces that are 90 degrees. These are the mounting bracket for the center stand.
Measure the front channel for the holes for the center stand mounting bracket.. Remember what the carpenters all say, “Measure twice, cut once.” This will determine how straight the frame fits on the scooter and you don’t want a crooked frame, do you? Wouldn’t be good. Line up the brackets and drill the necessary holes. Determine what the top hole size in the brackets will be based on your center stand bolt size. On my scoot, the center stand mounts with a lock nut which is welded to the frame. If it is cross-threaded, you might have to drill it out or grind off the nut.
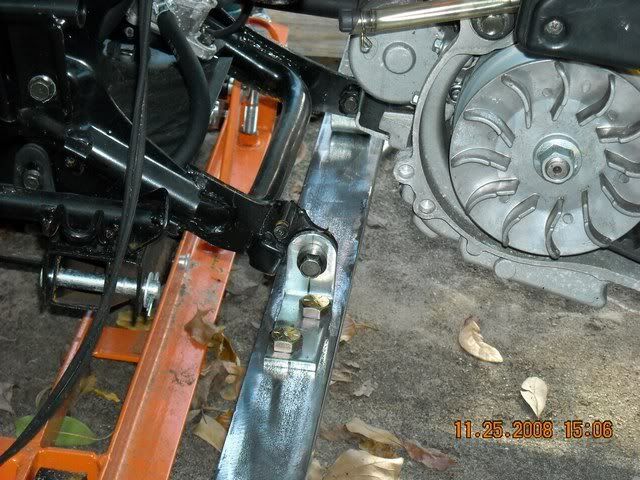
At this point, you might want to attach the mount brackets and give them a trial fitting before welding the frame.
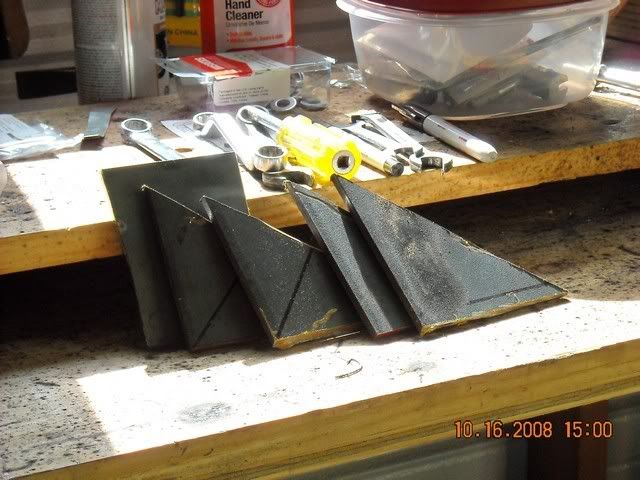
Take one of the 12” steel plates and cut out four 4” triangles to be used as a gusset at the four corners of the frame. Cutting ¼” steel plate is very difficult if you don’t have a professional machine shop. You might want to have it done by a professional. I originally thought that my 14” cut-off saw would do it, but I was wrong. I ended up using my trusty 4 ½ inch angle grinder.

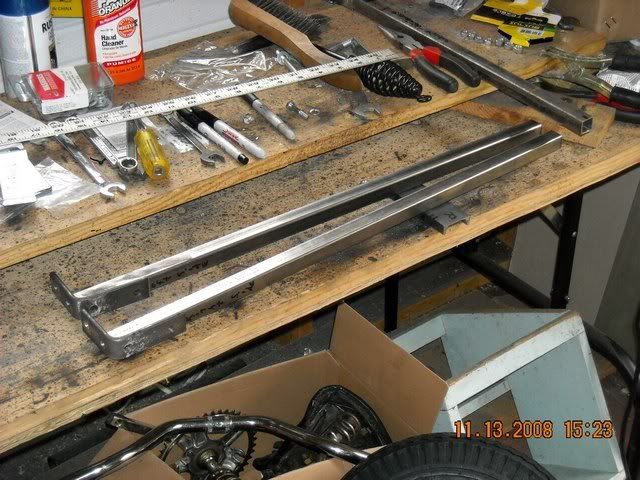
Cut off two pieces of the smaller steel channel to the appropriate length for the upper frame mounting bracket. Cut off two pieces of the 3/16” X 1” flat steel to the appropriate length. Drill four holes in each piece and bend at 90 degrees as shown. The two holes in the short leg will be used to puddle weld it to the steel channel, not for bolts. Cut the ¾’ square tubing into two pieces, about 2 feet long each. Using the bent bracket as a guide, mark and drill the holes for the bolts in the square tubing.
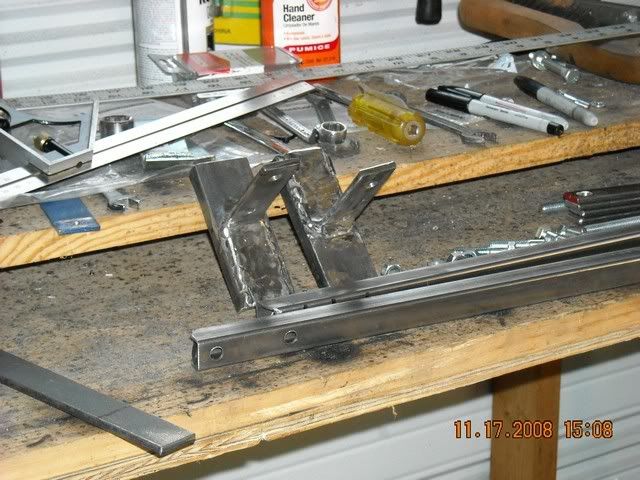
Weld the bent brackets to the steel channel and grind off the rough spots. As you can see, I did a lot of grinding since my welding is not so good. At this point you might want to paint the upper frame mount brackets and down tubes.

This might be a good time to make some stronger brackets for the U-bolts that are going to hold the upper frame mount to the scooter frame. I used some 3/16” X ½” wide flat steel I had on hand. As you can see, the original bracket is kind of wimpy. You might want to paint them too.

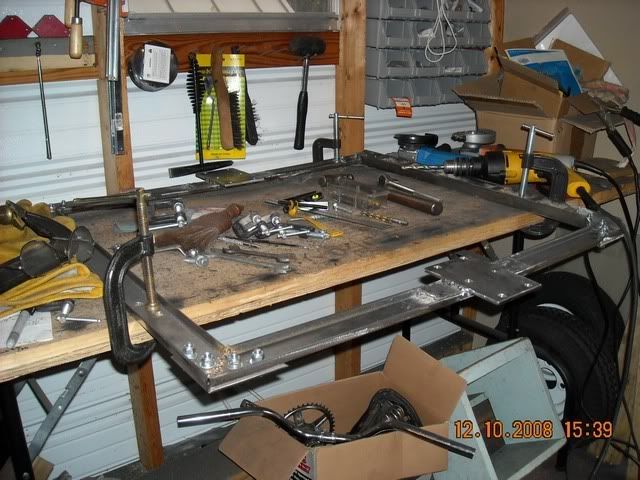
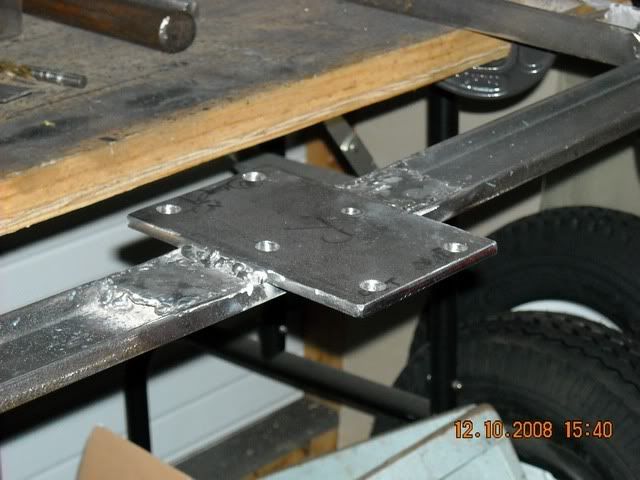
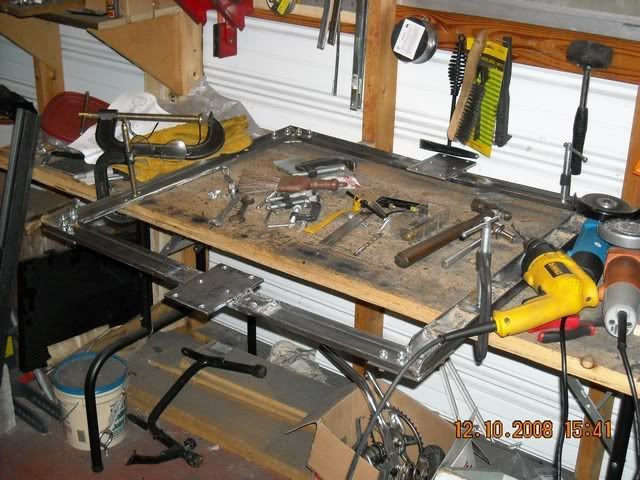
We are now ready to weld the frame together and mount the corner gussets. I would recommend clamping the frame down and using a square to get it straight. After welding the frame, take the corner gussets and drill four holes for some ¼” or 5/16” bolts (your choice). Clamp the gussets to the frame and drill the holes for the bolts. After bolting the gussets to the frame, you can now weld them to the frame. This may not be necessary, but I believe in redundant redundancy. Grind off and smooth out those welds and any other areas that need it.
Also, it would be a good time to mount the axle plates to the frame. Notice that the axle plate is a little wider than the axle mount, but is the same length as the axle. Before you weld the plate, you should clamp the plate to the axle and determine the place of the mounting holes. In my case the axles each had six holes of 5/16”. After I determined the placement (I wanted at least two of the bolts to go through the frame, axle plate and axle mount), I drilled the six holes in the axle plate. It is easier to do this in a drill press than when it is on the frame. If you look closely, you will see that one of the bolt holes is 5/16” (the rear one) and five of them are 3/8” (although all the mounting bolts are 5/16”.) This is so that the rear bolt acts as a pivot and there is enough slop in there to allow some movement if necessary to align the wheels.
To determine the placement, I clamped one of the axles with a wheel installed to the frame when I was trial fitting it. I tried to line the wheel on the frame up with the rear wheel of the scooter. Just eyeball it - you don’t have to be absolutely accurate. Be sure that the frame and axle clear the muffler and CVT cover. Notice in the pictures that I welded in the bottom of the right and left frame a piece of the channel to add a little extra strength where the axle plates will mount. You will have to grind down each side a little bit to get it to sit level in the frame. You can then weld it in.
Using the placement determined above, place the axle plate on the frame and lightly clamp it down. Square up the plate to the frame. This is a somewhat critical step. If you get them crooked, the wheel alignment will be off and cause problems with handling. When you are certain of the alignment, tighten down the clamp and tack weld the axle plate to the frame in several places. Recheck the alignment and drill the two center holes through the frame. Remember, the rear one is 5/16” and the front one is 3/8”. You can now finish welding the axle plate to the frame and clean up the welds.
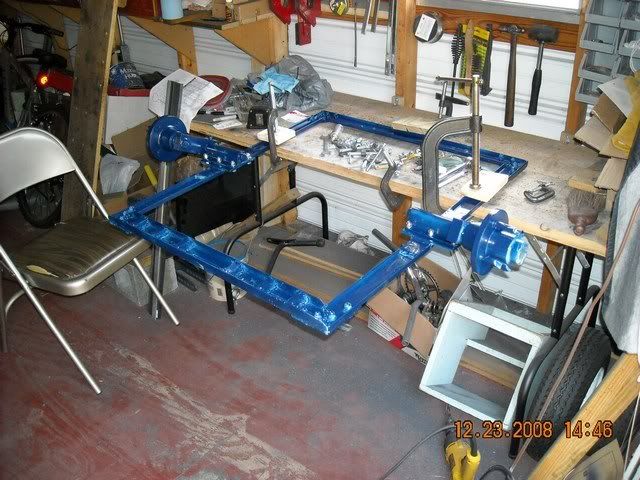
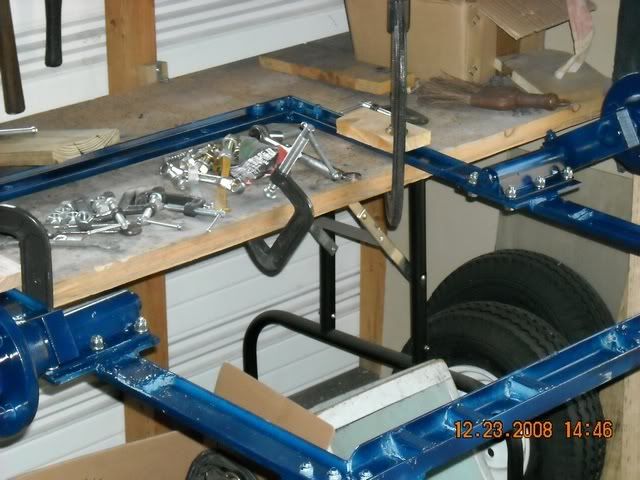
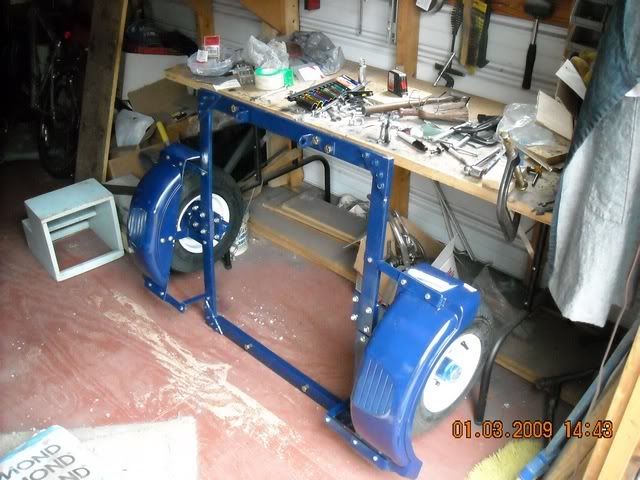
I decided at this point to go ahead and paint the frame and parts, including the axles and spindles. I decided to leave the wheels white because I was too lazy to mask them off and paint them. I had a little trouble with painting those plastic fenders. Not having a lot of experience with plastic, I assumed you had to prime it like metal, so I did. After this I bought some plastic paint and applied it. Didn’t stick so good and wasn’t as shiny as I like. After it dried, I painted them with regular shiny metal paint. They looked a lot better. After I had painted them with the plastic paint, I noticed that the can said “Direct to Plastic” which I think means no primer. Oh well, as my late mother-in-law used to say, “When all else fails, read the instructions.” Somewhere around this time you will need to fabricate some mounting brackets for the fenders and paint them. I used 3/16” aluminum flats 1.5” wide because it is easy to work with and paints up nice.
Part III: Putting it All Together
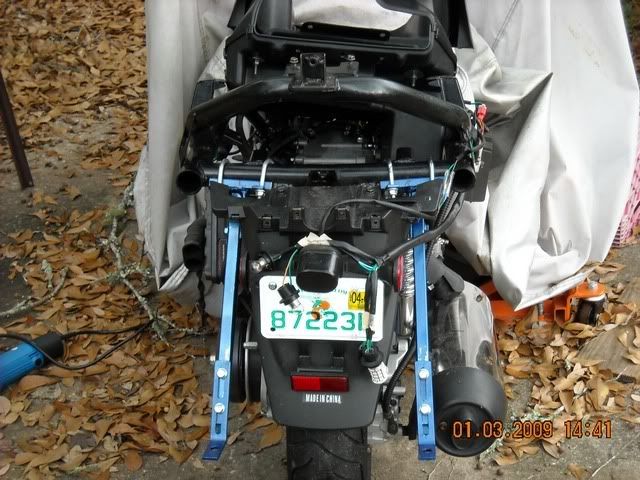
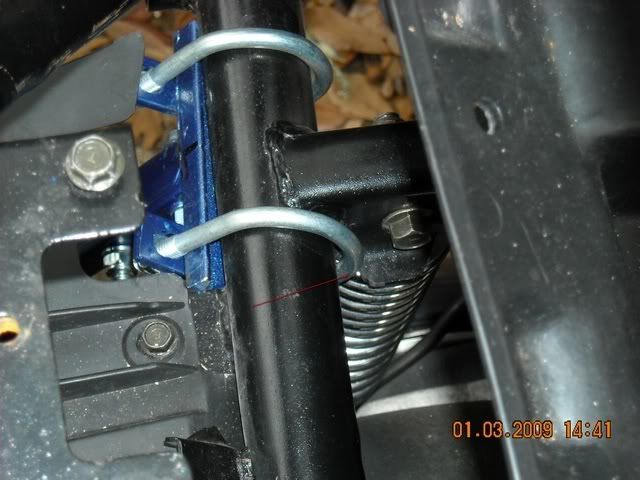
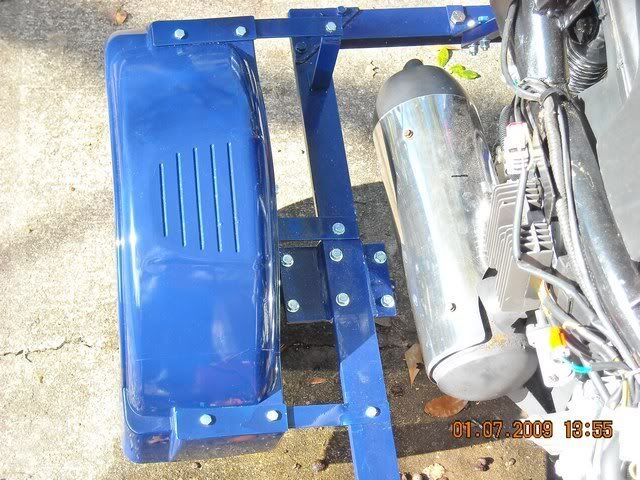
Install the rear mounts to the scooter where the shocks mount to the frame. Note that the only modification I had to make to my scooter was to grind out a little relief for one the U-bolts. It was only about ½” (shown by the arrow.) Don’t tighten them up too much at this point, since they will have to be adjusted. Make sure they clear the muffler and the CVT cover. I had to bend the right one a little bit, but no problem.
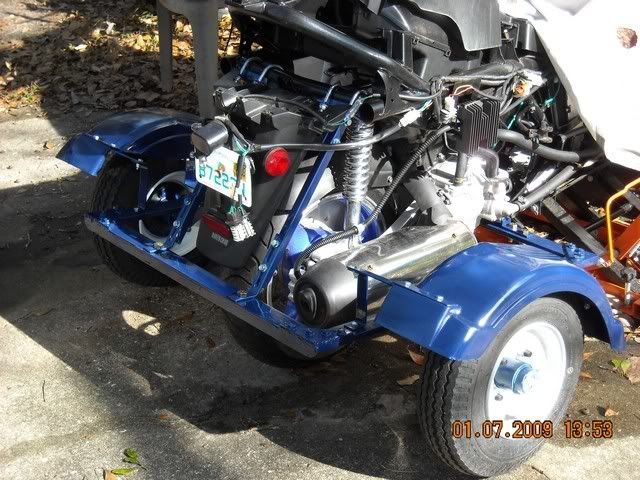
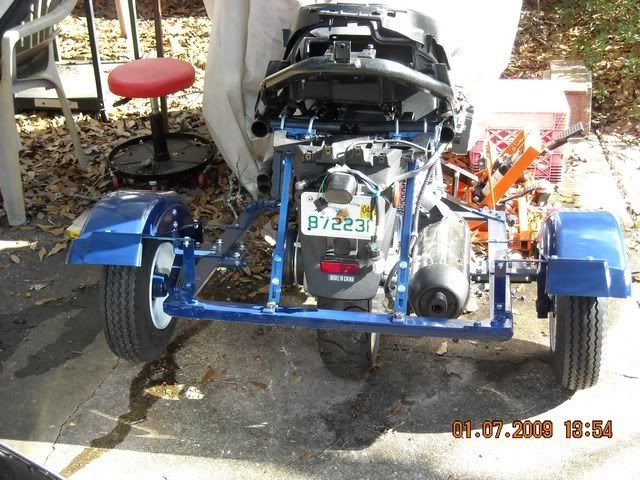
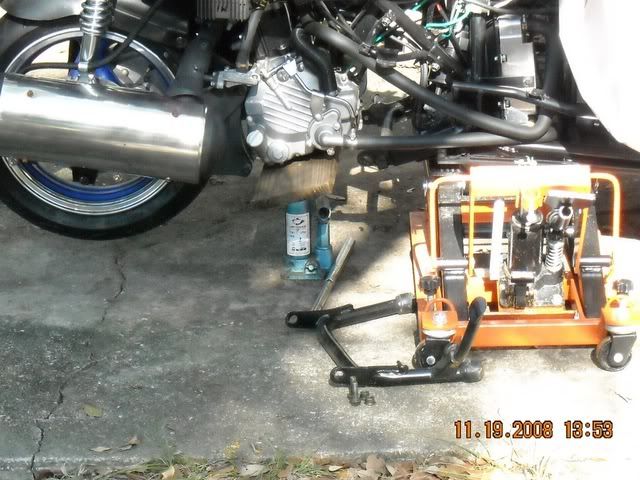
Now it is time to mount the frame to the scooter and make any necessary adjustments. With my motorcycle jack, the scooter was a little heavier in the rear, so I had to use a concrete block to weigh the front end down. You may also need to use a bottle jack or scissor jack under the engine. Not sure how that would work with the Linhai engine. Just be sure to use a piece of wood between the jack and scooter. (No, the water is from a shower that morning.)
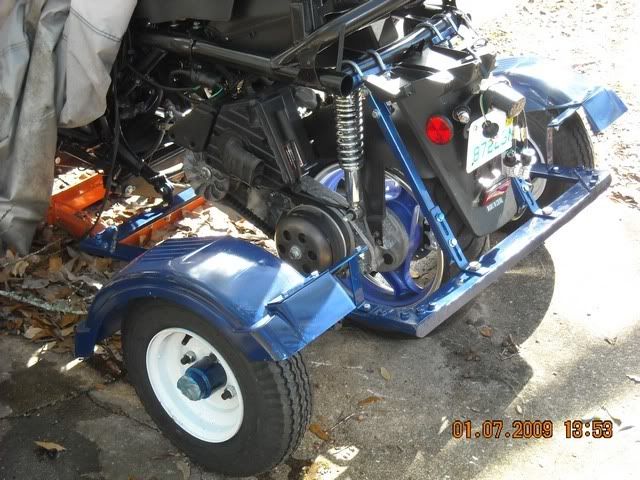
Now the tricky part is setting the preload. The more weight the trike wheels carry, the stiffer the ride will be. I didn’t want the ride to be real harsh. The method I used was to put a 1 X 6 board under each trike wheel and let the scoot down so that all the weight was on the ground. Then tighten up the adjustment bracket at the rear. Notice that the brackets have a slot milled in each bracket for up and down adjustments. You might have to experiment to find the right setting. After some experimenting, I found that the preload was too light and the scooter leaned too much. I placed the 1” X 6” board under the rear wheel and lowered the wheels so they just touched the ground and there was some weight on them. This seems to work out best for me.
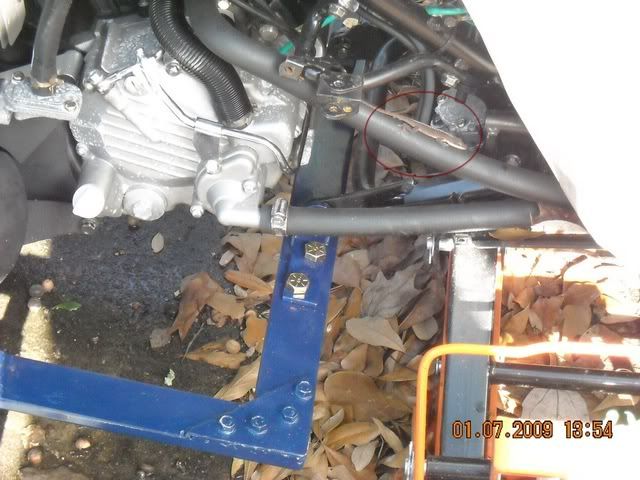
Note that there is plenty of room to work on the scooter even with the frame installed. I put the CVT cover on after installing the frame. There is plenty of room to change the oil and coolant.
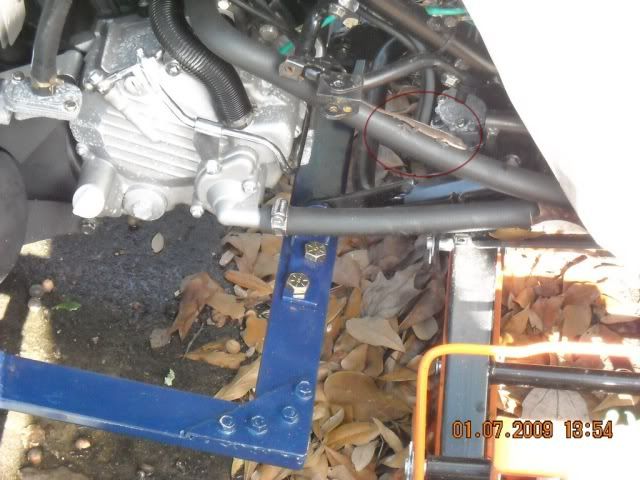
The little visitor likes to live under my scooter cover. Whenever I remove it, he comes out to give me a dirty look. Well, as long as he eats all those nasty bugs, I guess I’ll let him stay.
Final step is the hard part – putting everything back together without any leftover parts. Hope you enjoyed reading about the project. If you decide to give it a try, I encourage you to do so. I guarantee that it is not as difficult as I probably made it out to be. If you have a cheap welder, some common hand and power tools and a little mechanical ability, you can do it. For an older fellow (like me) or a physically challenged person, the result is a good thing.
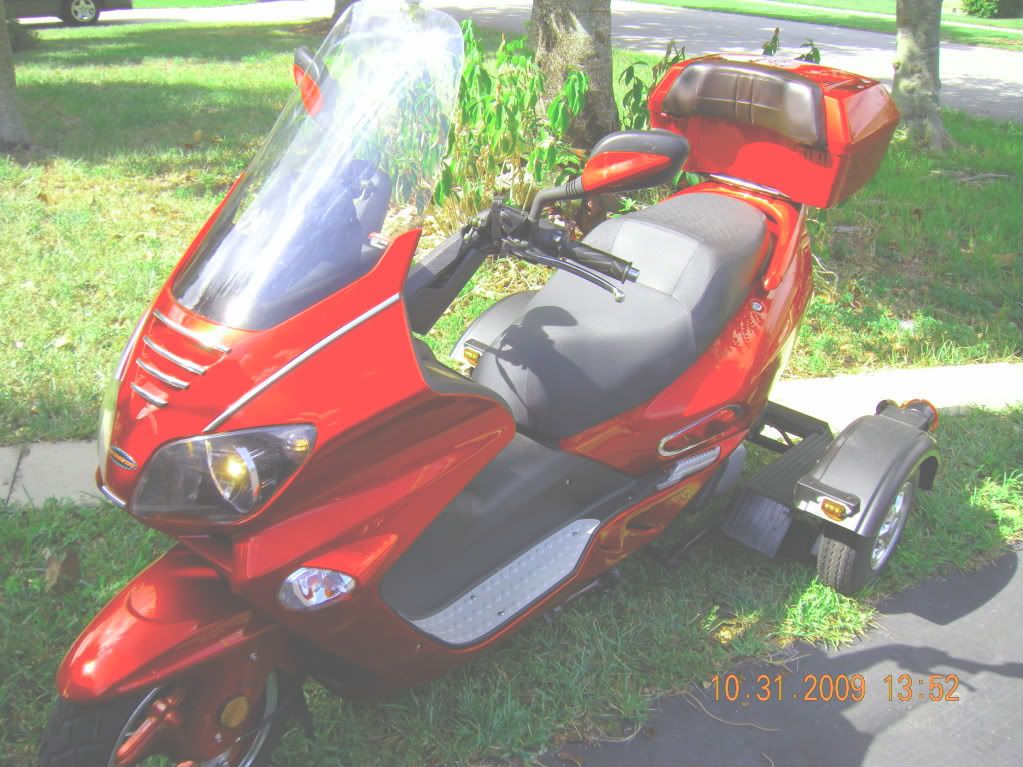
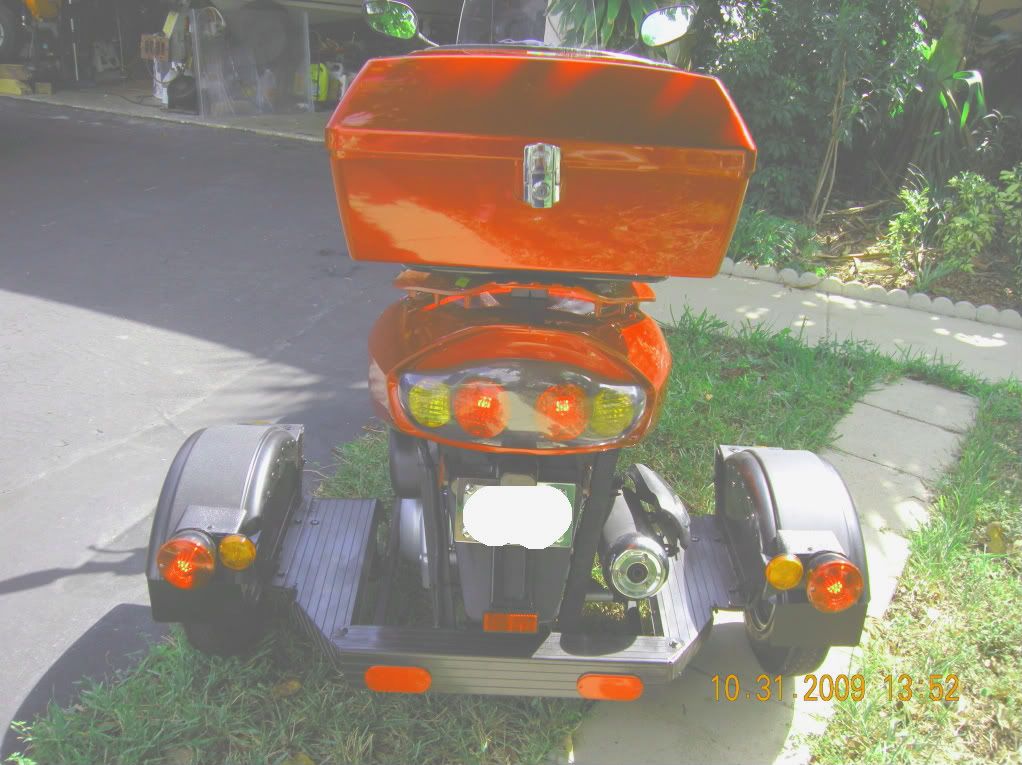
Here are a few pictures of the finished project (including my new Givi Windscreen).
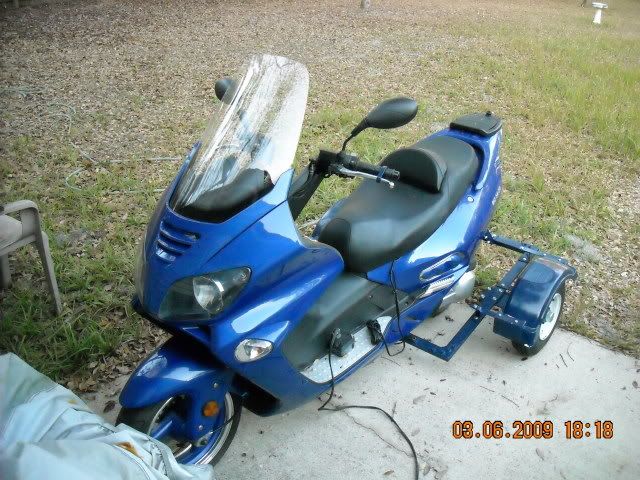
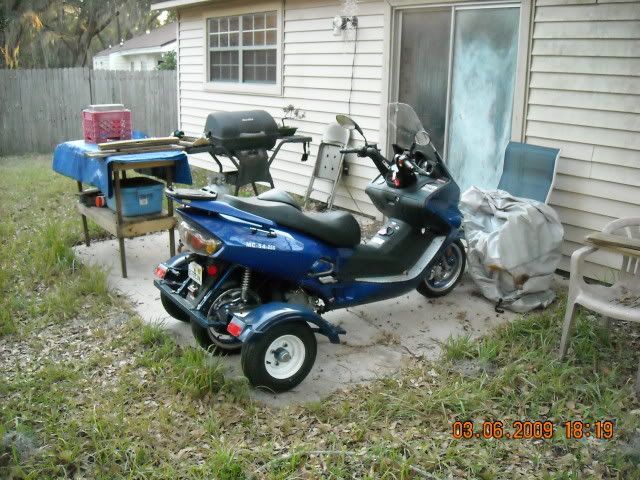
With the new Givi Windscreen):
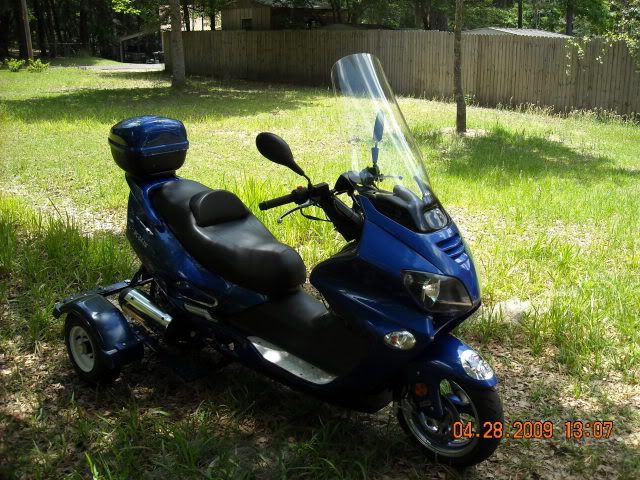
I’ve been driving it around the neighborhood, only 30 or 35 mph trying to get a feel for the differences. There definitely is a difference steering with the handlebars. You have to be very careful on corners and curves. It will definitely lean to the outside. On rough roads, it rides a little harder than I expected, but on good roads, it is very smooth. Overall it is a ride I can live with!
Now, what’s my next project? I sure liked JR’s saddle bags project. How do you think they would look on a trike? Also, I took off the butt bumper on the seat and it is in my workshop, possibly to put on a homemade driver’s backrest. Haven’t made a decision on that yet.


