|
|
Post by ryan_ott on Feb 2, 2007 21:59:14 GMT -5
I just wanted to show everyone how I put a real screw on type of oil filter on my RX200HP. First off here is the parts I purchsed they include a 3/4-16 thread pitch 1/4 npt port filter mount this was about $12. All the different fittings were about $10. Next is the various different fittings needed to run all the oil lines from engine to the filter and then to the oil cooler and back to the engine. I could of just cut off and used the banjo fittings from the factory oil lines but I wanted to save them.    I'll show you what the large fitting is for in a later installment of this. First drain the oil from your oil lines,  While the oil is draining you can start to assemble and modify the fittings. If anyone wants me to put up a list of all the fittings let me know and I'll post them up. First match up your old crush washer with your fittings to make sure you will have enough material left to seal up after you drill the center out. I used a 31/64 drill bit it was just about perfect.   When you assemble the fittings together make sure you use enough sealant on the threads I like to use the liquid type I think it seals better you could also use teflon tape but it might leak.  The oil is done draining by now so install the assembled fittings on your engine make sure you use new crush washers.  Go ahead an put the fittings onto the oil filter housing you might want to angle yours differently make sure to seal them   By this time you should of thought about where to mount the filter at. I'm not sure where I am going to leave mine at. I just put it here for the time being. Tomorrow I'll change it I think I might mount it so that it is visable from the side of the scoot.  I'll be finishing it up tomorrow all that is left is to run the oil lines and find a final resting place for the filter. |
|
|
|
Post by earlwb on Feb 3, 2007 0:02:49 GMT -5
Nice job. Very creative.
yeah I agree, not exactly a great place to put it. When you go to change the filter, it'll dribble old oil all over that nice clean motor.
|
|
|
|
Post by scooterollie on Feb 3, 2007 0:18:29 GMT -5
ryan;
Very nice job! Since it may be of interest to others, please list the parts. Only concern I have is for the capacity of the oil pump. Since the lubrication system was not designed for a filter, will it be able to handle filtration without starving the engine for lubrication? Looks like you have mounted the filter with the opening up so you could fill it with oil before screwing it onto the mount. This way you wouldn't starve the engine for oil during the first start up after oil change.
Your scoot already have an oil cooler? What about scoot engines w/o oil coolers>
Is the filter and mount made for small engines?
|
|
|
|
Post by earlwb on Feb 3, 2007 9:46:20 GMT -5
I think one should be OK. But having the oil filter about level with the oil tank level in the engine would be best. Having to pump oil up high above the engine, would not be good, as it may cause a oil pressure drop. But it depends on how good the oil pump is.
When you look at automobile engines, the oil filter is sitting a little above the oil level in the oil pan on the engine. So I would assume automotive engineers had many years of perfection into why it is at a location like that. I would copy that oil filter position as much as possible.
|
|
|
|
Post by ryan_ott on Feb 3, 2007 10:36:26 GMT -5
I fiqured that if the pump can pump the oil up to the oil cooler it can make it up to the filter that isn't quite as high as the cooler. I also moved it to a better location, I'll finish writing this later on my shop needs to warm up first it's like 9 degrees outside. As far as a pressure drop I'm not really concerned about that my RX200 actually has a good amount of pressure and flow from the oil lines. More about this later....
|
|
|
|
Post by sussexscooterhead on Feb 3, 2007 10:44:39 GMT -5
I'm happy to see you're doing this, Ryan!
Thanks for posting all the pics, it'll help me when I get around to doing mine!
+1
|
|
|
|
Post by ryan_ott on Feb 3, 2007 10:53:04 GMT -5
Thanks Sussex! I'll put up all the parts later and show the extra goodies.
|
|
|
|
Post by ryan_ott on Feb 3, 2007 21:13:46 GMT -5
So here is the rest: After it warms up to a comfortable 37 deg remove the oil lines from the oil cooler and install the rest of the fittings. Don't forget to seal them.    Go ahead and remove the oil lines completely. Run the oil lines so that they won't rub on anything and stay away from the exhaust. I don't really have pictures of this because they are a pain to run and are all tucked away.    The above pic is where I moved the filter to there is enough room to get a container under it to catch any oil when changing the filter.  That large fitting I was talking about earlier is for the oil temp gauge. Mounting the filter where it is takes a little effort to get it to clear the storage compartment if you keep it which I do. I could of welded up a bracket and mounted it further back but I didn't want to weld on the frame.  Yes I know that the gauge says water on it I also have one that says oil but the temp range is wider on this on. I got this from the $1.00 box at a performance shop here. Here is a side view of the filter, I like that you can see it from the side.  I ran my lines from supply side of engine to the in on the filter than the out side to the oil cooler and back to the retun on the engine. Don't forget to fill your oil back up with synthetic or your choice of oil. After your sure that you don't have any kinks and everything is away from the exhaust start it up and check for leaks.  When your sure that you fixed any leaks take it for a short ride around the block ( no pictures of this the wife refused too cold ) Check that those leaks are gone. After I have done this I think it's a good thing to have the oil volume is up from about .80 of a quart to almost 2 full quarts between the engine volume the filter and all the lines. Here's the parts list: In my case all threads are 1/4 NPT 4- street elbows 4- 5/16 female barb fittings 2- 5/16 male barb fittings 1- tee ( if your putting on a gauge ) 1-close nipple (the shortest they have needed for the tee ) 10-12 ft 5/16 hose make sure its ok for oil 8- new crush washers 1-31/64 drill bit or similar to drill out the street elbow I think that is everything but don't forget the filter you can use whatever you choose to or that you have room for. The only other addition I will make to this is to use the other center port on the filter housing for a oil pressure switch attached to a light to let me know if I lose pressure. Yes anidiot light. Also for everyone worried about the flow and pressure required to flow through the filter after all is said and done I remove the final retun line to the engine to check flow and there is the same amout as there is on the supply side of the engine. |
|
|
|
Post by ryan_ott on Feb 3, 2007 21:29:59 GMT -5
Your scoot already have an oil cooler? What about scoot engines w/o oil coolers> Is the filter and mount made for small engines? If you dont have the oem oil cooler you might be able to hook it up between the two drain plugs but it won't really be pressure it will only be sucking through the filter. So maybe not but I'm not sure The mount was designed for a transmission but I got it because of the size of the ports. I think the filter is for a briggs engine just something I had on my work truck you could use something different. |
|
|
|
Post by earlwb on Feb 3, 2007 21:32:13 GMT -5
Wow, nice job. Thanks for all the information too.
|
|
|
|
Post by ryan_ott on Feb 3, 2007 21:38:10 GMT -5
Any other questions let me know. Its done and it works.
|
|
|
|
Post by sussexscooterhead on Feb 3, 2007 22:14:42 GMT -5
That's cool!
It looks in one of the pics like it's close to the starter motor - there won't be a problem with it hitting when the suspension compresses will there?
I'd hate for it to get damaged and leak while you're out on the road somewhere.
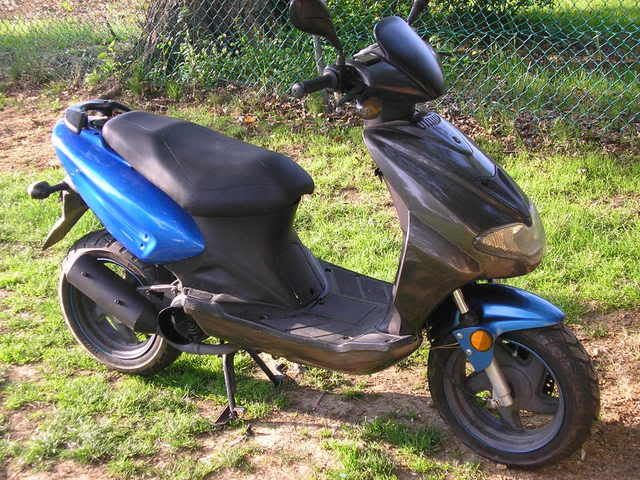
We have the same scooter! Mine's blue, too.
|
|
|
|
Post by ryan_ott on Feb 3, 2007 22:19:42 GMT -5
There is plenty of room I already thought about that. I saw that yours was the same in your pics. I like it!
|
|
|
|
Post by aristide1 on Jun 28, 2007 19:50:23 GMT -5
Ryan, and I never talk like ths but man, you rock!
Now do the same for the trans and you will become Dawg of the Year!
Just great info.
|
|
|
|
Post by ryan_ott on Jun 28, 2007 20:26:29 GMT -5
aristide1, glad you like it. Its been on there for a few months and everything is working great. I have changed to a different style of clamp those didn't leak but they would get shinny around the hose, the clamp I use now you need a special tool to put them on they kind of ratchet on there. You cant take them off except for cutting them off.
|
|
|
|
Post by dtwscooter on Jun 25, 2008 21:05:35 GMT -5
ryan,
Great post. Just started reading because someone provided the link. Can you update us on how this mod panned out for your over last year or so? Did you lengthen the oil change interval? Did the scooter run better?..,
|
|
|
|
Post by gstraitman on Jun 26, 2008 11:19:17 GMT -5
nice work. Assemble parts in a kit and sell it with instructions. Make money! Hey, My idea so I get a freebee. LOL
Ferd
|
|
|
|
Post by isawhim on Jun 26, 2008 12:31:23 GMT -5
Love the mod...
You can also reduce some pressure, if you use a small "H" bridge, to connect the in/out, acting like a bypass, which is always on. You could use a restricted jumper, or throw an actual valve on it, to manually bypass flow, if you suspect a problem.
Even cooler... Hook it up to the throttle-position... The more throttle you give it, the more it opens. (You don't want to force it through the filter at high speeds. That resistance, when the filter is blocked, will slow down your engine, and stress the manual pump.)
The oil-filter has a bypass inside, but it is designed for a larger pump, I am sure.
Even with a filter bypass, half will still flow through the filter, it if can. (Since the "H" would be two "T's", the flow would want to keep flowing in the direction it is traveling. The joint between has less resistance, but it is 90-deg off angle, making it harder to travel, unless the other path is blocked.)
Just a note about the sensor...
Chances are, the gauge was on sale, because it did not show the correct temperatures. (It may require a special sensor, not the stock sensor.)
If you use an oil-temp sensor on a water-temp gauge... you are not seeing the correct temperature. Both have separate resistance values. (You would have to relabel the numbers, to be the oil-numbers. It is not the gauge that reads the temp, it is the sensor. The gauge just translates the output.)
EG... Resistance on sensors, and results with the correct gauge.
R = 0 OHM (O-T = 600) (W-T = 300)
R = 50 OHM (O-T = 500) (W-T = 275)
R = 100 OHM (O-T = 400) (W-T = 250)
R = 150 OHM (O-T = 300) (W-T = 225)
R = 200 OHM (O-T = 200) (W-T = 200)
R = 250 OHM (O-T = 100) (W-T = 175)
R = 300 OHM (O-T = 0) (W-T = 150)
R = 350 OHM (OutOfRange) (W-T = 125)
R = 400 OHM (OutOfRange) (W-T = 100)
R = 450 OHM (OutOfRange) (W-T = 75)
R = 500 OHM (OutOfRange) (W-T = 50)
R = 550 OHM (OutOfRange) (W-T = 0)
Not a big problem... You just have to find any two temperatures on the dial, and confirm them. You can use an in-line resistor to lower the range, and also raise the range. To lower the range, a low-resistance resistor goes in-line on the power lead. To lower resistance, you have to feed it voltage, using a high resistance connected to power, on the resisted side.
The sensor is just a giant resistor that changed resistance with temperature, called a thermal-pot. The display gauge is just a cheap voltage meter, showing the output voltage from the thermal pot resistance.
Both can only measure 0 - 12v, so the pot determines the result of the range. That is why water will say 300F while oil says 600F, both are 12v. The (OutOfRange), is how your car computer sees a sensor that fails. Oil sensors are not as sensitive, and usually do not measure values below a certain temp. They use the high end on the display, since lower is irrelevant.
|
|
|
|
Post by ryan_ott on Jul 20, 2008 11:23:39 GMT -5
Sorry I haven't replied earlier I haven't been on here that often lately. The filter has been working great. I moved the filter under the floorboards to get it out of the way. I decided to solder the fittings so there is no chance of leaks, never had any leaks just seeping on 1 occasion. I still change my oil more often then needed. Its oil, cheap insurance. The filter has a bypass built into it but going through all that trouble of a seperate bypass isn't really needed. It flows good and pressure is still good. The gauge is a mechanical type there are no sendors needed and it is very accurate. The temps are usually in the 160-180 range deponding on the speed I am driving and outside temps with use of a oil cooler.
|
|
|
|
Post by bike4miles on Jul 25, 2008 11:00:28 GMT -5
Nice idea. I was surprized the first time I changed the oil on my scoot that all it had for a filter is a little screen!
|
|
|
|
Post by gottascoot on Jul 26, 2008 22:37:46 GMT -5
I have been using these remote filters on my cars&trucks for years,I also stick a round magnet (you can buy at hardware store ,30lb.-50lb. pull)on the bottom of the filter.when you change the filter just switch the mag.to the new filter.I think it will make the motor last alot longer.
|
|
|
|
Post by ryan_ott on Jul 27, 2008 20:04:42 GMT -5
The magnet is a pretty good idea, I think I may of saw curved magnets before for that use. It'll work good as long as its not a aluminum part that fails. But thats why a real filter is a better idea then the screan they call a filter.
|
|
|
|
Post by isaacson06 on Jul 31, 2008 22:10:01 GMT -5
i would like to do this mod to my gy6 but i dont have these oil passages in the block so is there anything i could do ??
|
|
|
|
Post by ryan_ott on Aug 1, 2008 21:19:55 GMT -5
There are oil coolers available for the gy6 engines that don't have the stock oil coolers. It attaches between the 2 oil drain bolts, you could use that kit for the proper fittings or search for the right threads. You could hook the filter up in between those lines and you may be OK.
|
|